Showing posts with label Blogging Marathon. Show all posts

Tuesday, June 17, 2014

Nimmakaya Pesara Pappu | Tangy Lemon Dal

For this week theme on BM I'm  presenting "Summer Special". Enjoy the dishes & don't miss the update. Check out the Blogging Marathon page for the other Blogging Marathoners doing BM# 41.


Lemon Dal is a tasty yet cooling dish for summer's or for any hot day for that matter. Moong Dal is believed to cool the body temperatures on hot days & it is a easy to digest lentil, which is tasty yet easy to cook. My mom use to regularly make this dal in summer, which goes along with pickles of the season. You can also make pulusu & chutney with dal & they are deliciously tempting.


Prep Time-10mins | Cook Time-45mins | Serves-3people
Ingredients
1Cup moong dal {Pesara Pappu}
1&1/2Cup water
1Medium onion finely chopped
2Green chili's chopped
1/4Tsp turmeric
Few curry leaves
2Tsp lemon juice
Salt to taste 
2Tbs oil 
1Tsp mustard seeds
1Tsp jeera 
3Red chili's cut in to half 
1/4Tsp hing {Asafetida}
Directions
- Wash moong dal & pressure cook with water for 2whistles. Switch off heat & allow it to cool completely. 
- Mean while heat a pan with oil & to that add mustard, jeera, red chili's & hing.
- Once the mustard starts jumping, add onions, curry leaves & green chili's to the seasoning.
- Fry onions till they are translucent. 
- Add turmeric, salt & cooked dal to pan along with 1cup water. Mix them well. 
- Bring dal to boil & switch off heat. 
- Mix in lemon juice to dal.
- Serve dal with rice & ghee.
Note
- Don't add extra water while cooking if the dal is thick enough. 
- Adjust lemon juice as needed.


Follow me on "Facebook", "Google+", "Pinterest" for daily updates. Leave me a comment on any queries regarding this recipe & I will be able to answer it for you as soon as possible.


Sunday, June 15, 2014

Tomato Pickle | Tomato Avakaya

For this week theme on BM we are "Pickling". I decided on making 3 Andhra style pickles for this week.Enjoy the dishes & don't miss the update. Check out the Blogging Marathon page for the other Blogging Marathoners doing BM# 41.

Pickles are a comforting dish in our house. When I'm not in a mood of cooking I depend on pickles, combined with simple dal along with yogurt. I get few pickles from India & some temporary one's like this dish when in need. This particular pickle is a sun dried version & super tempting too. 
Tomato Pickle is a saver for busy days. I always make sure that I have a box of it in my refrigerator ready to go. There are many ways of making this pickle & here I'm sharing the recipe of my mom. This version has both the methi powder & mustard powder in it. The flavor is tempting with the spice mix added in it.  
Prep Time-2Days | Serves-3people
Ingredients 
6Red tomatoes 
1Tbs + 1Tsp salt
1Tbs + 1Tsp chili powder
1Tbs + 1Tsp mustard powder
1Tbs + 1Tsp methi powder
Seasoning 
3Tbs oil 
1Tsp mustard seeds
1Tsp chana dal
1Tsp urad dal
4Red chili's 
Few curry leaves
1/2Tsp hing {Asafetida}
Directions
- Clean tomatoes with water & pat them dry with a dry towel. Leaves on counter for 1hr. 
- Chop tomatoes to small pieces. 
- In a bowl add tomatoes, salt, chili powder, mustard powder & methi powder. Mix them well & cover up with a lid. 
- Allow it to sit for 24hrs on counter. 
- On a plate layout the tomato pieces along with the oozed juice. 
- Sun dry it for 2 days, until tomatoes are little dried. 
- Heat pan with oil. To that add chana dal, urad dal, red chili's & mustard seeds to it. 
- Once the mustard starts jumping add curry leaves & hing to pan. 
- Switch off heat & add it to pickle. Mix it well.
- Adjust salt & chili powder if needed. 
- Serve with rice & a dollop of ghee.
Note
- Don't over dry tomatoes. 
- Chop tomatoes in to small bits. 
Follow me on "Facebook", "Google+", "Pinterest" for daily updates. Leave me a comment on any queries regarding this recipe & I will be able to answer it for you as soon as possible.


Friday, June 13, 2014

Cauliflower Pickle

For this week theme on BM we are "Pickling". I decided on making 3 Andhra style pickles for this week.Enjoy the dishes & don't miss the update. Check out the Blogging Marathon page for the other Blogging Marathoners doing BM# 41.
Cauliflower Pickle has been on my to make list for long time. I tasted this pickle at my aunt's place & liked the flavor of it. So I decided on trying this pickle & we just loved it.
Cauliflower is one of those veggies I keep a little distance from. I never liked the smell of them so much & hardly will buy this veggie. This time I decided on trying this pickle which I liked & bought a small flower with much hesitation. I learned that the blend of spice mixes & garlic has dominated the smell of this flower & made the pickle much flavorful. I used much less of oil than needed & it didn't made any difference to the pickle.
Prep Time-24hrs {Prepping + Sitting} | Serves-3people
Ingredients 
3Cups cauliflower florets
1Tbs + 1Tsp red chili powder
1Tsp methi powder
1Tsp mustard powder
1/4Tsp turmeric
1Tsp size ball of tamarind / 2Tsp lemon juice
2&1/2Tsp salt
2Tbs oil
3Garlic cloves sliced
Few curry leaves
Seasoning 
1Tbs oil
1Tsp mustard
Few red chili's 
Directions
- Clean florets with water & lay them on a towel. Allow them to dry completely. 
- After 4hrs to 5hrs pat them one with a dry towel & keep aside.
- Heat a pan with 2Tbs oil. To that add garlic cloves & curry leaves. 
- Fry till garlic starts to brown a little. 
- To pan add tamarind & cauliflower florets. Fry them for 3mins-4mins & switch off heat.
- Allow the florets to cool completely. 
- To pan add chili, mustard, methi, turmeric & salt.
- Mix them well & allow it to sit for overnight. 
- Adjust salt & chili powder if needed. 
- Heat pan with oil & to that add mustard seeds & red chili's. 
- Once the mustard starts jumping switch off heat & mix it to the pickle.
Lemon juice - If you are using lemon juice instead of tamarind, add it along with all the spice powder & mix it well. If needed more adjust accordingly.
Note
- Florets shouldn't become soft. 
- Florets should be cut in to small pieces.
- Feel free to add little more oil if needed.
- Day by day the pickle gets delicious. 
- You can use either lemon juice or tamarind in this dish.
Follow me on "Facebook", "Google+", "Pinterest" for daily updates. Leave me a comment on any queries regarding this recipe & I will be able to answer it for you as soon as possible.


Thursday, June 12, 2014

Dosa Avakaya

For this week theme on BM we are "Pickling". I decided on making 3 Andhra style pickles for this week.Enjoy the dishes & don't miss the update. Check out the Blogging Marathon page for the other Blogging Marathoners doing BM# 41.

Dosa Avakaya is a delicious Andhra pickle made of yellow cucumbers & spice mixture. It is a year round pickle & can be made in small batches for much fresher pickle & also for temporary use.
Mustard Powder is what makes it a avakaya. The flavor is strong & powerful because of mustard powder. At home it is one of those pickles that will be made regularly. I got this recipe from my mom. she generally leaves few seeds with the cucumber pieces & she says they give a nice bite & also infuse some tangy taste to the pickle.

Prep Time-24hrs {Prepping + Sitting}  | Serves-2people
Ingredients
1Cup bite size chopped cucumber pieces {Dosakaya}
1&1/2Tsp salt 
1&1/2Tsp chili powder
1Tbs mustard powder
2Tbs oil
1Tsp mustard seeds
Few red chili's 
1/4Tsp hing {Asafetida} 
Directions 
- In a bowl add cucumber pieces, salt, chili & mustard powder. 
- Mix them well & keep aside. 
- Heat a pan with oil. To that add mustard seeds & red chili's.
- Once the mustard starts jumping add hing & switch off heat. 
- Allow the the oil to cool completely & then add it to the cucumber mixture. 
- Allow pickle to sit in a air tight container for one day. 
- You will see some water oozed out by the cucumbers & the pickle is ready to eat. 
- Adjust salt & chili powder if needed. 
- Serve with rice & a dollop of ghee. 
Note
- Always store in a airtight container. 
- Don't scrape the skin of cucumber.
- Refrigerate it for increased store life. 
- You can avoid mustard & heating the oil totally.
-  Just mix hing & oil to mixture & rest remains the same. 
- For little tangier taste add 1/2Tsp tamarind to the mixture.


Follow me on "Facebook", "Google+", "Pinterest" for daily updates. Leave me a comment on any queries regarding this recipe & I will be able to answer it for you as soon as possible.


Saturday, June 7, 2014

Coriander Peanut Chutney


Coriander Peanut Chutney is a delicious chutney accompanies well with any South Indian Tiffins & also pairs well with rice too. In this chutney peanuts are the star & they can be felt in every bite along with other ingredients. This is a mildly spiced chutney & can be adjusted as per your requirements. 

Prep Time-10mins | Cook time-10mins | Serve-3people
Ingredients
1/4Cup peanuts
2Cups chopped cilantro / 1Bunch coriander leaves
2Tomatoes chopped
2Green chili's sliced
2Red Chili's
2Garlic cloves chopped
1Small onion chopped
1Tbs oil 
Seasoning 
2Tsp oil
1/2Tsp mustard 
1/2Tsp jeera
2Red chili's 
Directions 
- Heat pan with oil, peanuts & red chili's. 
- Fry peanuts till they turn light brown. 
- Transfer peanuts & red chili's to a bowl. 
- To the same pan add onions, garlic & green chili's. 
- Fry them on medium heat & to pan add tomatoes.
- Cook for 2mins or till tomatoes are just soft enough. 
- Now add in cilantro to pan & cook for 2secs. {Don't over cook cilantro}
- Switch off heat & allow it to cool. 
-  Now grind peanuts & red chili's to a smooth paste.
-  Next add the veggies & grind them smooth chutney. 
- Heat a pan with oil & to that add mustard, jeera & red chili's. 
- Once mustard starts jumping add seasoning to chutney. 
- Serve chutney with Idli, dosa & vada or enjoy it as you like.
Note
- Add little water if needed while grinding. 
- Add cilantro to pan before switching off heat. 
- You can add a little tamarind for a much tangy taste. 


Follow me on "Facebook", "Google+", "Pinterest" for daily updates. Leave me a comment on any queries regarding this recipe & I will be able to answer it for you as soon as possible.


Wednesday, June 4, 2014

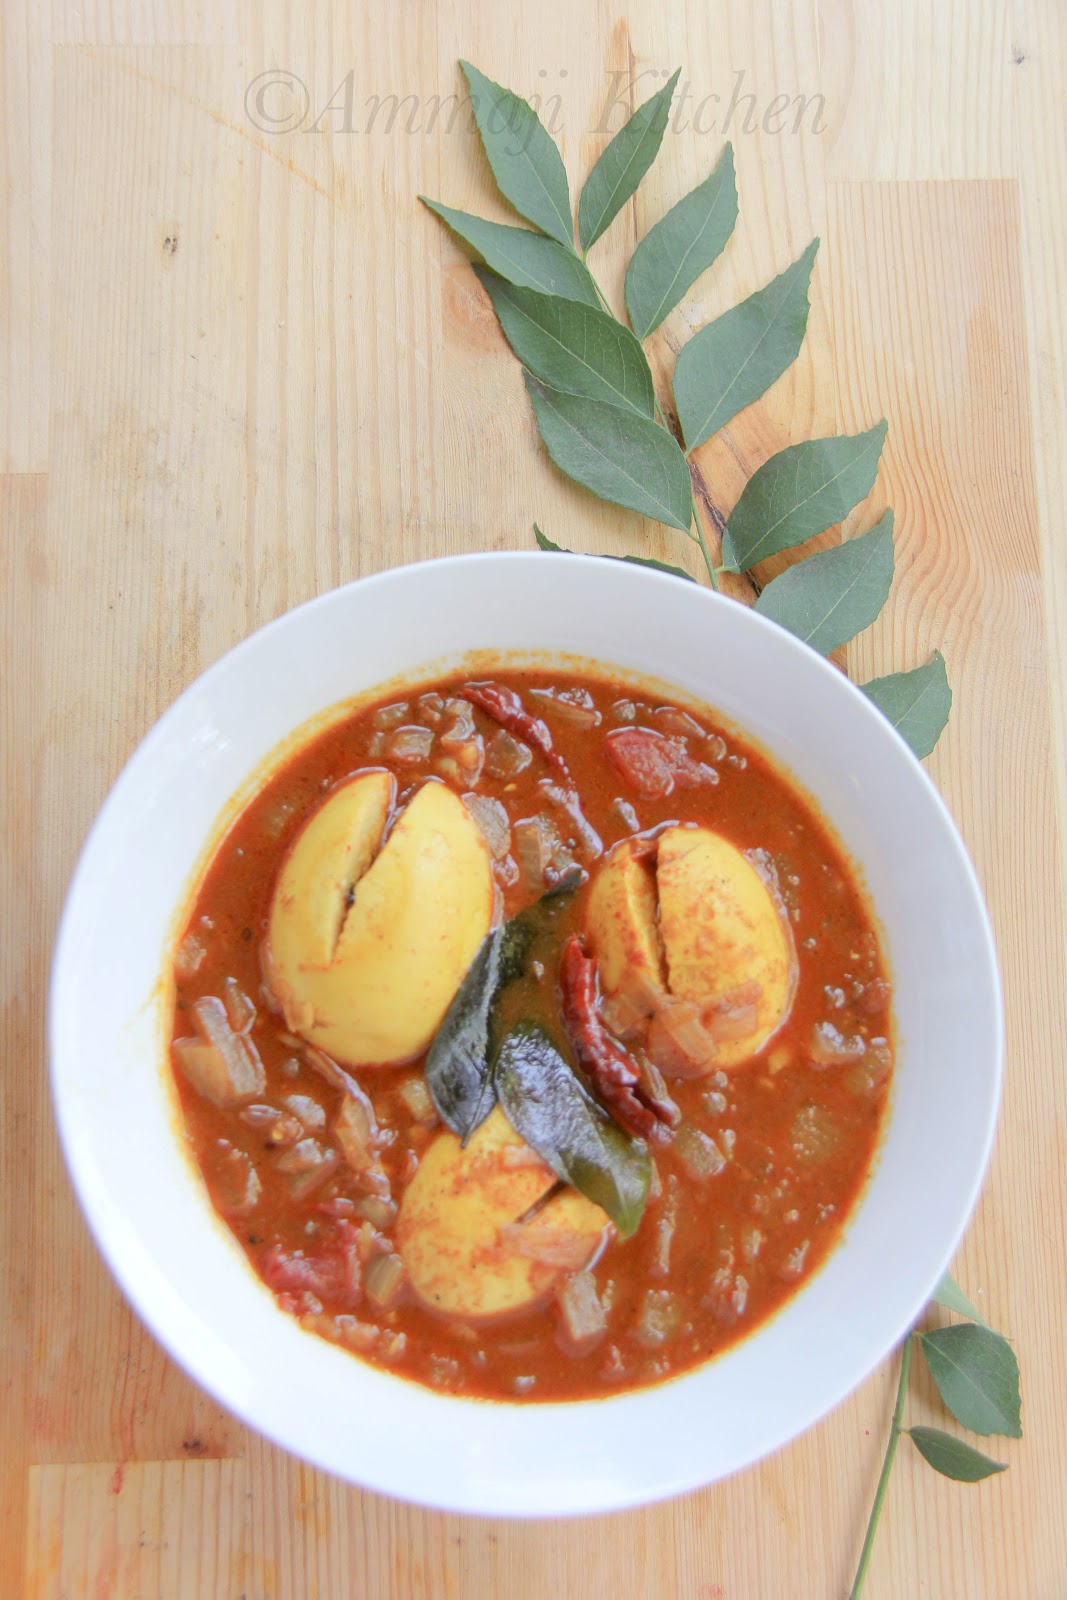
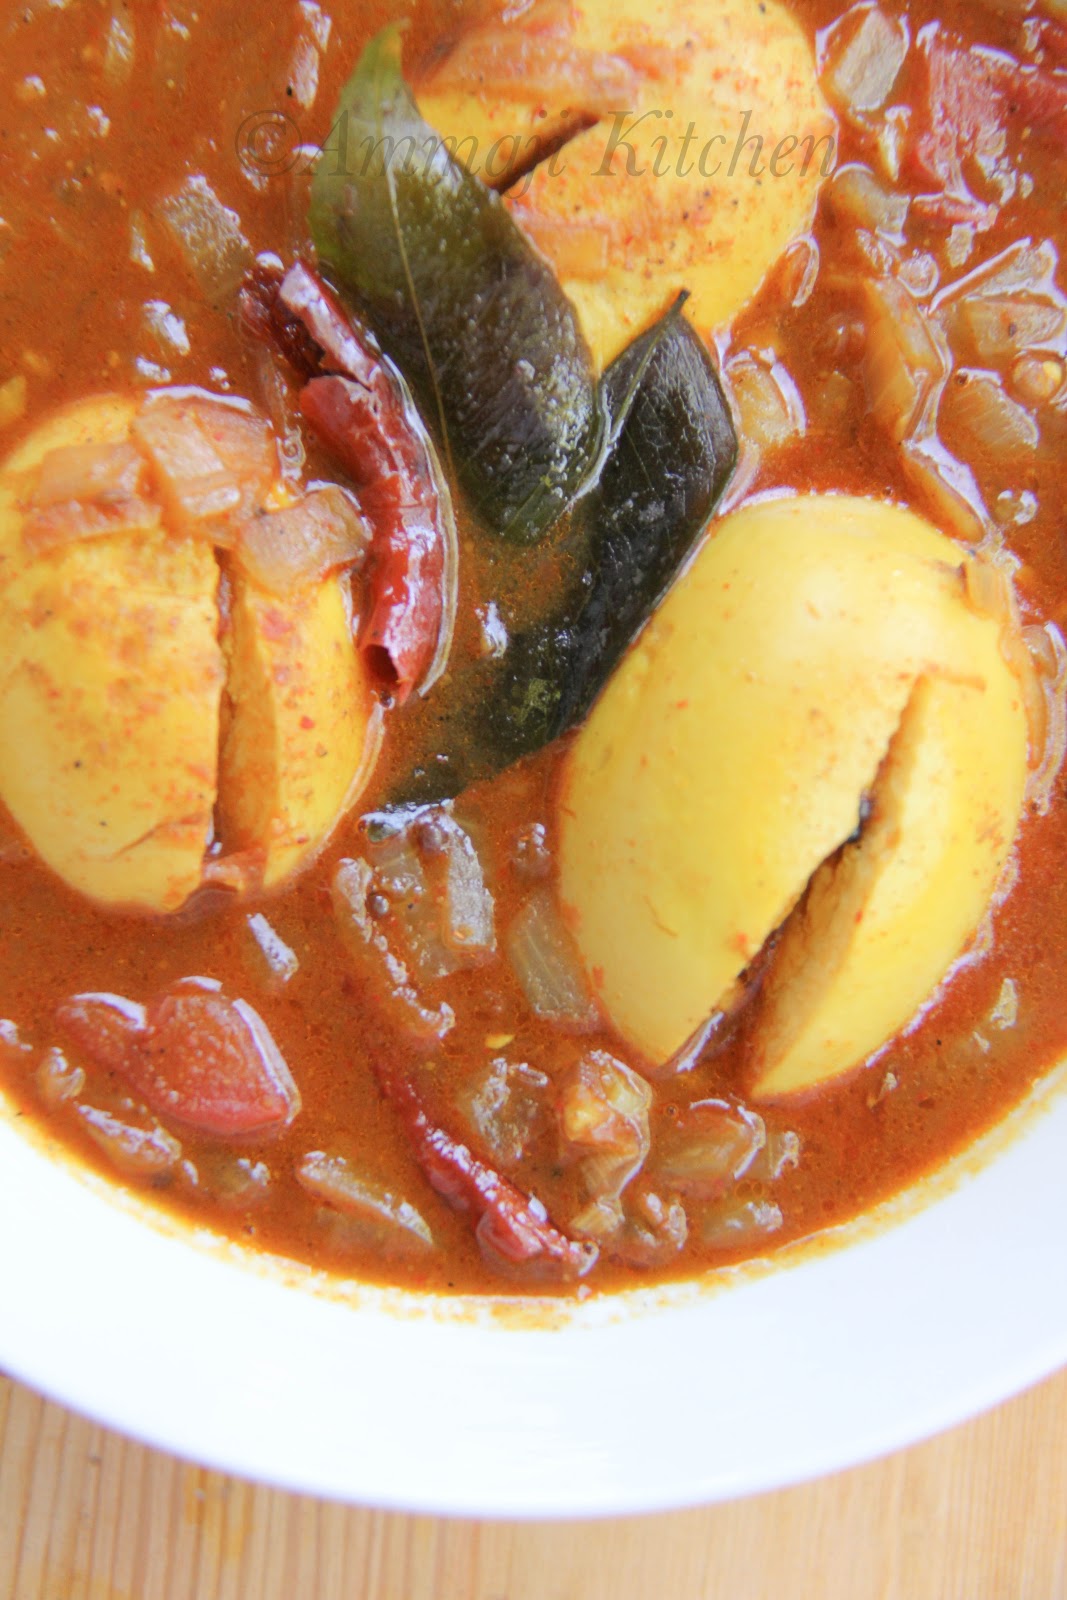
Egg Pulusu | Kodi Guddu Pulusu

Egg Pulusu

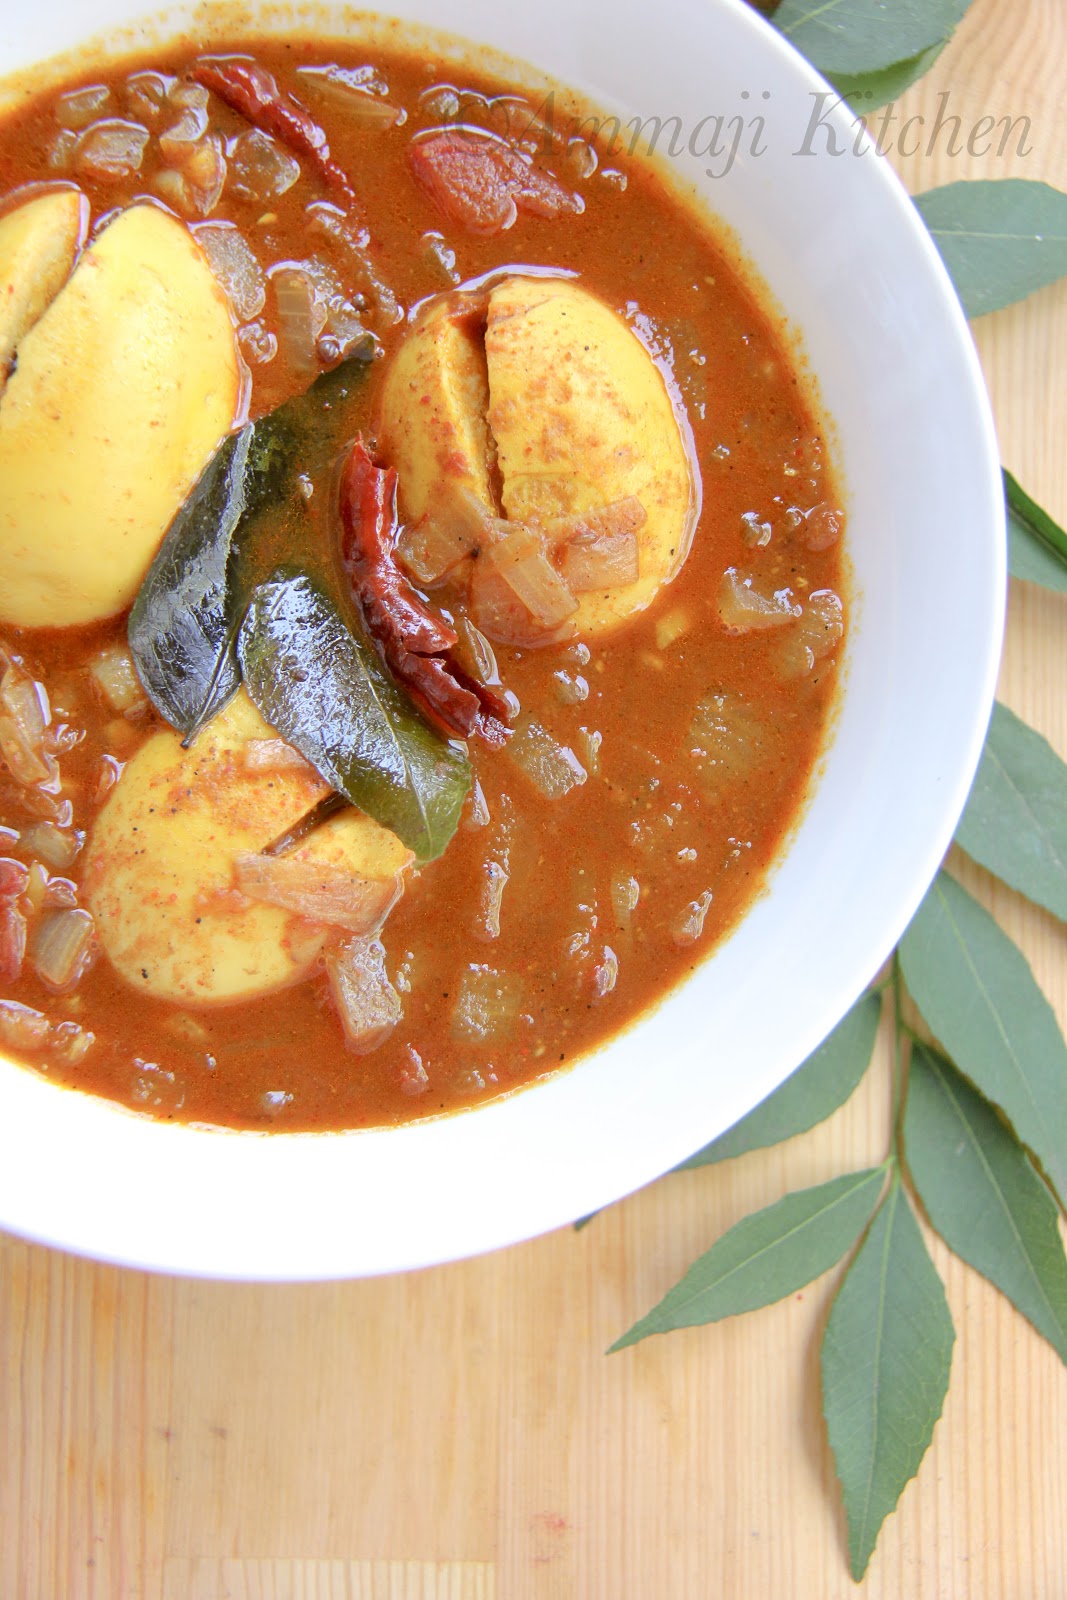
Egg Pulusu is spicy tangy dish from Andhra Pradesh. Gravy for this dish is simple & very basic. Eggs are the star of this dish & when you use a fried egg the texture of it will make this dish much tempting. 


Egg Pulusu
Prep Time-10mins | Cook Time-30mins | Serves-2people
Ingredients
4Eggs boiled
1Onion finely chopped
1Tomatoes chopped
2Garlic cloves sliced
2Green chili's sliced half
Few curry leaves
1/2Tsp turmeric
1Tsp Red chili powder {Adjust as needed}
1Tbs Tamarind pulp
1Tbs pulusu powder { Use coriander cumin powder}
1&1/2Cup water
1/2Tsp sugar
1Tbs oil
Salt to taste
To Fry Eggs 
1Tsp oil
1/4Tsp turmeric
Seasoning
1Tbs oil
1Tsp jeera
1Tsp mustard seeds
2Red chili's cut equally
1/2Tsp hing {asafetida}
Few curry leaves
Egg Pulusu
Directions
- Heat pan with 1Tbs oil. 
- Add garlic & onion to pan. Fry for few seconds. 
- To the pan add tomatoes, green chili & curry leaves. 
- Close it with lid & cook till tomatoes are soft. 
- Mean while heat pan with 1Tsp oil. Add turmeric & boiled eggs to pan. Fry them on both sides to light brown.
- Once tomatoes are soft add water, tamarind, pulusu powder, turmeric, sugar & salt.
- Check salt & spiciness in the dish. Add chili powder as needed. 
- Slit fried eggs in the middle & drop them in to tamarind gravy. Bring gravy to boil & keep cook it for another 5mins. Switch off heat.
- Heat a small pan with oil. 
- To that add mustard, jeera & red chili's. 
- Once the mustard jumps add hing & curry leaves to pan. 
- Switch off heat & add seasoning to pulusu.
- Serve it with rice & a dollop of ghee.
Note
- Ignore the pulusu powder if you want to. 
- Gravy should be little thick & shouldn't be like watery. 


Egg Pulusu
Follow me on "Facebook", "Google+", "Pinterest" for daily updates. Leave me a comment on any queries regarding this recipe & I will be able to answer it for you as soon as possible.

Tuesday, June 3, 2014

Rasam | Charu | Saaru | How to Make Rasam


Rasam is a well known South Indian dish & without it the meal is never complete. This is a comforting simple dish which is healthy, appetizing & helps with good digestion.
Rasam has many variations, based on the region & state. I'm sharing my mom's rasam recipe, which is little sweeter & tangier. Curry leaves & Coriander leaves or any one these leaves will add a lovely flavor to the dish. 
Rasam powder is the main ingredient in this dish. This powder is packed with flavors from different herbs & which are released in to rasam when it is added. Adding rasam powder at initial stage will make this much flavorful. 
Other rasam dishes
Pappu Charu | Toor Dal Rasam
Ulava Charu | Horse Gram Rasam | Hurali Saaru | Kollu Rasam


Prep Time-5mins | Cook Time-30mins | Serves-3people
Ingredients
2Tomatoes finely chopped
3Cups water 
2Tsp rasam powder
2Tsp tamarind pulp / Small ball of tamarind {adjust as needed}
1/4Tsp turmeric
2Tsp jaggery powder / 1Tsp sugar {adjust as needed}
Few curry leaves 
Salt to taste
Seasoning 
1Tsp mustard 
1Tsp jeera
Few methi seeds
1Tbs butter/oil
1/2Tsp hing {Asafetida} 
2Garlic cloves chopped
Directions 
- Take a vessel with water & to that add tamarind pulp & dissolve it completely. 
- If using the tamarind as itself, wash with little water & them soak it in 1cup of water for 30mins or till it gets soft. Squeeze water out of tamarind & use it part of 3cups water. Adjust the flavor as needed.  
- To that add turmeric, curry leaves & chopped tomatoes. 
- Add salt, rasam powder & bring to boil. Cook till tomatoes are soft & perfect. 
- Now add sugar & adjust salt if needed. {Don't switch off heat}
- Heat pan with butter. 
- Add mustard, jeera & methi seeds to pan. 
- Once the mustard starts jumping add hing & garlic. 
- Switch off heat mix it to boiling rasam. 
- Switch off heat to rasam.
- Serve with rice & dollop of ghee. 
Note
- You can add both curry & cilantro leaves to the boiling rasam. 
- Don't over boil the rasam. 
- Once the tomatoes are done, it means rasam is ready.
- You can add tomato puree instead of sliced tomatoes.


Follow me on "Facebook", "Google+", "Pinterest" for daily updates. Leave me a comment on any queries regarding this recipe & I will be able to answer it for you as soon as possible.Check out the Blogging Marathon page for the other Blogging Marathoners doing BM# 41


Wednesday, May 28, 2014

Pav | How to make Pav


Pav is Indian yeasted bread. The most famous snacks include pav bhaji, Vada pav, misal pav, masala pav etc..
Origin - This bread “Pao” was introduced by Portuguese when they ruled Goa {India} in 15th century. Later in migration it this bread was brought to Mumbai & it became famous over there. {Sources: Holiday Goa}
Recipe - The recipe is simple & doesn't involves eggs. I used milk in this recipe instead of water & kneaded it for 10mins before & after rising. Making small dough balls will allow the bread to be soft & smooth after it was baked.

Prep Time-3hrs | Cook Time-30mins | Serves-3people | Yields-7pav's
Ingredients
1&1/2Cups all purpose flour {unbleached}
1/2Cup + 2Tbs milk { add as needed}
2Tsp instant yeast
1/4Tsp salt
1Tbs +2Tsp sugar
1Tbs butter melted
1Tbs flour for dusting
1Tsp butter {baking pan}
1Tsp olive oil {rising bread}
1Tsp milk {brushing on the pav}
Directions
Making Dough
- Grease a bowl with olive oil & set aside.
- In a bowl add flour, yeast, salt, sugar & butter.
- To that add milk little by little & mix well.
- Knead dough for 10mins.
- Form a dough & place the dough in greased bowl.
- Cover up & keep it in a warm place.
- Allow it to raise for 1&1/2 hrs.
Make Pav
- Grease a baking pan with butter.
- Dust a wooden board with flour & place the risen dough.
- Punch out all the air & knead dough for 5mins.
- Divide the dough into equal size small balls.
- Place them in the baking sheet leaving a little space in between.
- Cover up & allow the bread to rise for 1&1/2hr.
Baking
- Pre heat oven @350degrees for 10mins.
- Brush dough with milk & place them in oven.
- Bake @350degrees for 30mins or till the pav are brown on top.
- Remove from oven & brush some butter to them.
- Allow them to cool before serving.
- Serve as you like.
Note
- Use a bigger bowl for rising dough.
- If dough comes out sticky add some flour & knead the dough. 
- If the place is too warm the risen dough will smell like yeast. 
- Don't exceed the rising time of bread, or it will smell like yeast.

Follow me on "Facebook", "Google+", "Pinterest" for daily updates. Leave me a comment on any queries regarding this recipe & I will be able to answer it for you as soon as possible.Check out the Blogging Marathon page for the other Blogging Marathoners doing BM# 40.