Thursday, September 19, 2013

Pedda Usirikaya Pachadi | Pickled Amla | Nellikkai Thuvaiyal

Pickles are the durable than chutneys. The pickle I'm sharing with you today is one of those ones, that can be stored & used refrigerated for months. You can enjoy it the same way or add a little fresh tempering /seasoning before serving for a fresh feel. 
There are many ways of making amla pickle, but this one is the healthier way of making it. 


Ingredients
1 Cup chopped amla
1 Tbs. mustard seeds 
1 Tbs. jeera
1 Tsp. methi seeds 
3 Red chilis 
3 Green chili's ( Adjust acc. to taste) 
Less than 1/2 tsp. of turmeric
1 Tsp. asafoetida / hing
2 Tbs. Oil
1/4 Cup cilantro leaves 
Salt


- Heat a pan with oil. Add mustard, methi & jeera to it. 
- Later add the red chilis to pan. Once the mustard starts jumping add hing & turmeric to pan & switch off heat. 


- Allow the seasoning to cool before you grind. 
- Coarse grind the seasoning & to the blender add green chili's, cilantro & salt. Adjust the taste & the pickle is ready to serve.


Serve with rice & a little ghee.


Wednesday, September 18, 2013

Onion Pakora / Ullipaya Pakodi / Onion Fritters

Summer is slowing descending & we are feeling chillness in the weather. It's time to welcome fall & to enjoy evenings with hot beverages & snacks.Try this yummy pakoras for your chilled eve's.


2 Servings 
Ingredients
1 Medium onion sliced
1 Cup besan
1&1/2 Tsp. chili powder
1/2 Tsp. jeera powder
1 Tsp. salt ( adjust )
Few curry leaves
6 Tbs. water


- Mix the ingredients other than onion in to a thick smooth paste.


- Mix onions with the batter as shown above. Heat a pan with oil in medium heat. 


- Now take a spoonful of bater & slowly add it to the oil. Cook it thoroughly on both sides till they turn brown as shown above. 


- Remove them on to a tissue & repeat the same with rest of the batter. 
- Serve warm with ketchup or green chutney.

Note: 
- For a crispier snack you can add 1/2 besan & 1/2 rice flour. 
To check on whether the oil is hot or not you have to drop in a little batter in to oil & it should immediately lift & float on top of the oil as shown above.


Tuesday, September 17, 2013

Pesarapappu Atlu | Mung Bean Kimchi Pancakes | Moong Dal Pancakes

South Korea, my first international destination to this beautiful country left lots of good memories in my life. Being a vegetarian I never had a chance of experimenting Korean food. But some where in my deep mind I wanted to taste it badly.
Lately I have been exploring on World Wide Web for korean vegan recipes & came across many delightful blogs who are purely vegan & now it’s my chance to experience them.
I chose to make a simple pancake made of mung beans & kimchi. A little intro about Kimchi is that it's a traditional korean side dish made of napa cabbage as main ingredient. 


Kimchi has a fish sauce as one of the ingredients, but I replaced it with a vegan kimchi, which I bought from whole foods store. I served it with a Indian green chutney & it tasted yum. 


I got this delicious recipes from Beyond Kimchi blog & made little changes to it. 
Yields : 10 pancakes 
Ingredients
1/2 Cup moong dal 
2 Tbs. rice 
2 Tbs. scallions / spring onions 
1/2 Cup chopped kimchee (Store bought)
1 Tsp. soy sauce 
1&1/2 Tsp. red chili powder 
Salt for taste
2 Tbs. sesame oil


- Soak moong dal & rice for minimum 8hrs to 24hrs in refrigerator. Grind them coarsely & keep aside. 
- Now to the ground batter add scallions, kimchee, soy sauce, salt & chili powder. Mix them well.


- Heat pan with oil & add the batter as shown. You can make 3pancakes at a time depending on the pan width.


- Close it with a lid allowing it to cook completely. Now reverse the pancakes & cook them crisp on both sides.


- Once they are done crisp & cooked both sides remove them & repeat the same with other batch. 


- Serve them warm with a sauce or chutney. I served it with cilantro chutney

Note: 
- The recipe I followed asked to refrigerate the soaked dal & rice.
- You can replace kimchee with other veggies like onion, ginger, corn & etc. 

Monday, September 16, 2013

Nan Khatai - Indian Eggless Cookies


Nan Khatai, the Indian eggless cookie is a perfect treat for any occasion. I saw this recipe going around in many blogs & was just waiting for the perfect moment to make them. 
This is one of those recipes, which requires very few ingredients & can just get a perfect cookie. There are many variations for this recipe that I have come across & I tried the simple one as a beginner. 


Yields : 8 Nan Khatai's 
Ingredients
½ Cup All-purpose flour
1/4 Cup ghee/butter
¼ Cup powdered sugar (Adjust Acc.)
½ Tsp. cardmon powder
Crushed pista & almonds for garnish


- Preheat oven @ 200 degrees. Layer your baking sheet with parchment paper.
- Take all the ingredients other than garnishing ones. Mix them well to a round dough.


- As shown above make little balls as shown above. They make 8 to 9 balls.
- Pat the ball into a flat round & roll it in pistachio & almond mixture & place it on the baking sheet.
- Repeat same with rest of the balls. 


- Bake them @ 200 degrees for 20 mins.
- Remove them from oven & allow them to cool for 10mins on wire rack before you serve. 


Serve with tea, coffee & milk.

Note: 
- Add another 2 Tbs.butter if needed.
- Garnish the cookies as you wish.
- Don't over bake them for more then the time needed. They become hard on the outside. ( Own experience) 
- Once you have rolled the dough check if you need to do any sugar adjustments. 

Friday, September 13, 2013

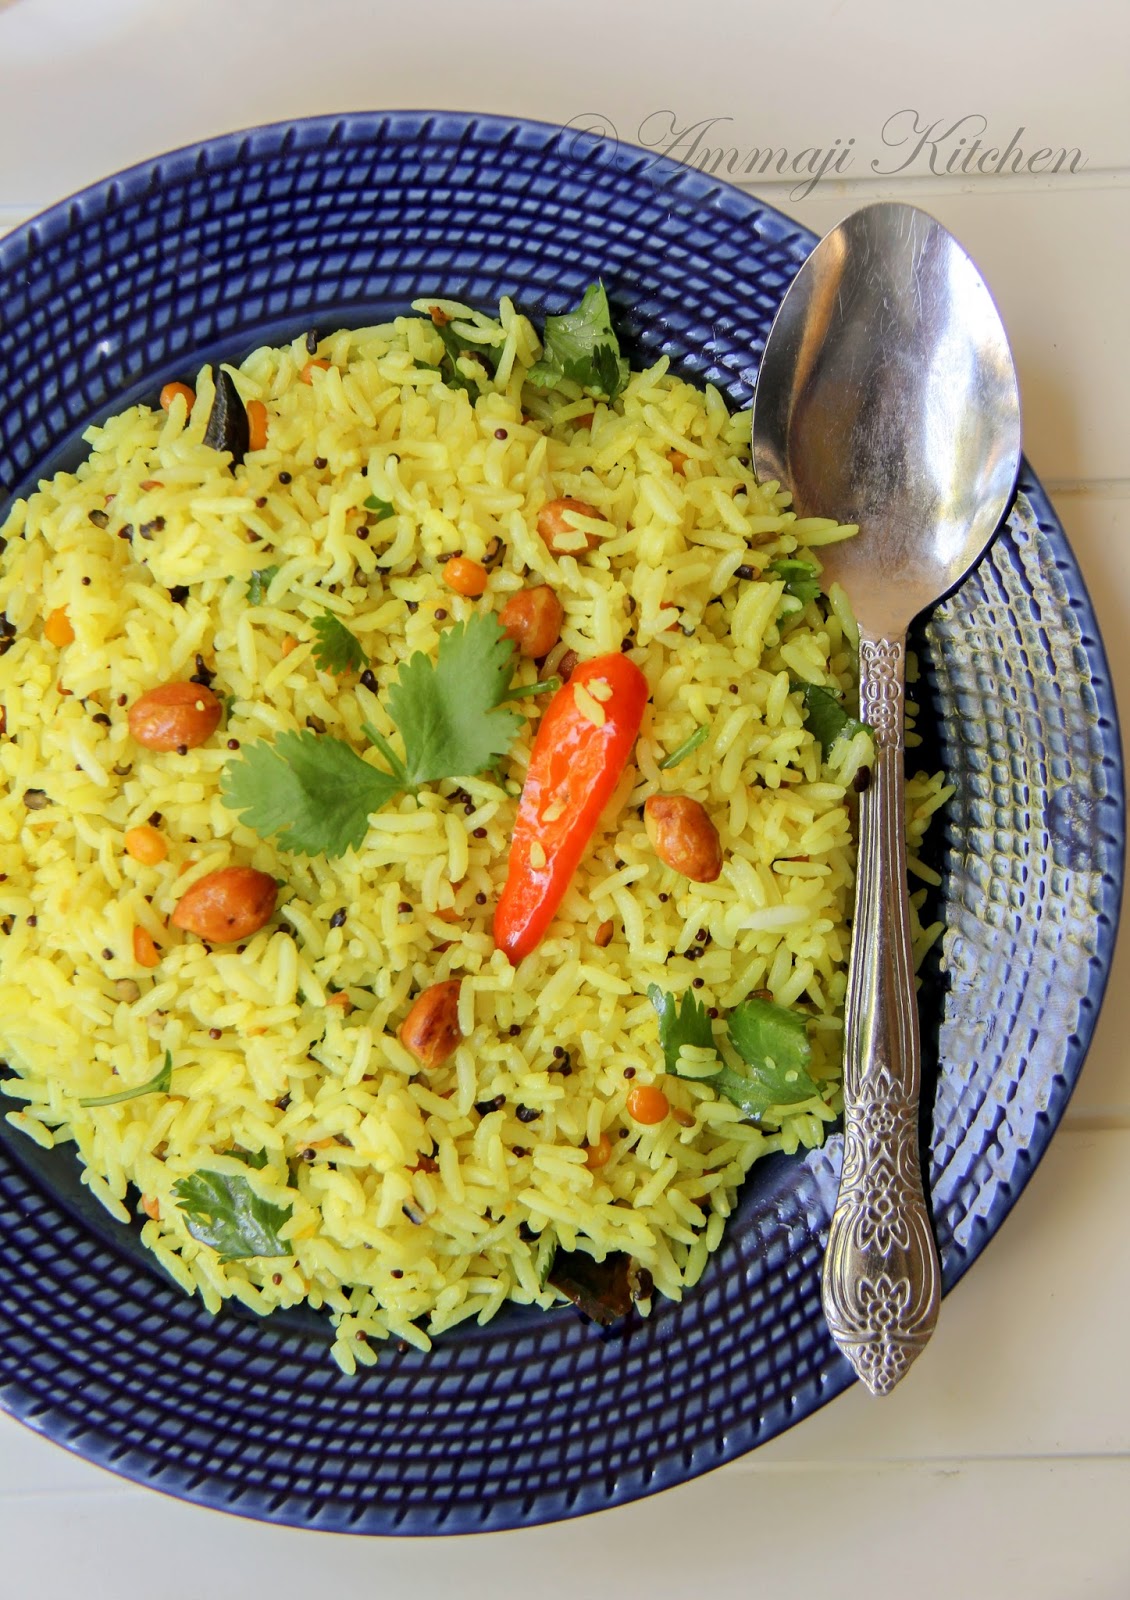
Nimmakaya Pulihora | Lemon Rice

@ Ammaji Kitchen
Lemon Rice is a most comforting & easy dish. I love to have this rice at any time of the day. Making this dish is easy & tastes very delicious too. I love this dish very much when my mom makes it. She is a good cook & I love observing her while she cooks. The simplest changes she makes to the dish do bring a lot of difference in the flavors. My mom makes this lemon rice for dinner on weekdays. She generally uses a little more of seasoning than I used here. It tastes heaven. So sharing my comfort food recipe with you all here.
@ Ammaji Kitchen
Prep Time:10mins 
Cook Time:1hr {Includes cooking rice & cooling it off}
Serves:2-3people
Ingredients 
2Cups uncooked rice /4Cups cooked rice 
4Cups water
Few curry leaves 
2Tbs oil
Juice of 2 lemons
Salt 
For Seasoning
2Tbs mustard seeds
2Tbs chana dal 
2Tbs urad dal 
1/4Cup peanuts
6Red chili's cut into half
3Green chili's slit into half
1Tbs grated ginger
2Tsp turmeric
2Tsp hing
1/4 Cup oil 
Cilantro for garnish
Directions 
- To cook rice add in rice, oil, curry leaves & water to the cooking bowl. Cook rice accordingly & cool it before making lemon rice.
- Heat pan with oil. To that add channa dal, urad dal & peanuts. 
- Allow them to fry till channa dal changes a little color. 
- Add mustard seeds, ginger, green & red chili’s to pan. Once the mustard starts jumping add hing & turmeric to pan & switch off heat. 
- Take a wide pan or plate. Add cooked rice & seasoning to it. 
- Next add lemon juice & salt little by little according to your taste. 
- Sprinkle coriander & mix it well. Taste the rice & adjust taste if needed. 
- Allow rice to sit for 30mins before you serve.  
- Serve it with your favorite chutney & enjoy.
@ Ammaji Kitchen
Note
- Cook rice according to your convenience. Electric cooker is my to go everyday & cooked rice according to it's instructions
- Using basmati rice will give a nice texture to the dish. I don't feel using basmati for south indian dish. Don't feel authentic.
- Allow the seasoning to cool before you touch it or there is a chance you might burn your hand. 
- Every lemon is different  & some have too much of juice. So add little by little as said above to avoid too much tanginess to the recipe.
@ Ammaji Kitchen
Follow me on "Facebook", "Google+", "Pinterest", "Instagram" for daily updates. Leave me a comment on any queries regarding this recipe & I will be able to answer it for you as soon as possible.


Thursday, September 12, 2013

Kothimbir Vadi / Kothimeera vadalu

Speaking of life, which is a very complicated to understand & is not so easy on us as we think. You find new challenges at your every step of life, which we have to break through to lead a good life.
Ok….Now I’m not talking philosophy here but in general that’s the truth we all have to accept.
Coming to the dish kothimbir vadi, a Maharashtra delicacy, which is made of cilantro, besan & spices, is an irresistible dish for cilantro lovers. I was planning on making them for ganesh chaturdhi festival, but ended up making them earlier than that. This version actually has garlic to it but you can just exclude if needed.


Ingredients 
2 Cups chopped cilantro/ coriander leaves / kothimeera 
2 Cups besan / senagapindi/ chickpea flour 
2 Tbs. sesame seeds 
1 Tsp. minced garlic 
1&1/2 Tsp. red chili powder ( Adjust Acc.)
1&1/2 Cups water 
1/2 Tsp. turmeric 
Salt for taste 
¼ Cup oil


- Grease a microwavable bowl with little oil. Keep rest of the oil aside for frying  vadi’s.
- In a bowl mix all the ingredients other than oil in to a thick batter.
- Pour the batter in to greased bowl .
- Microwave it for 2 to 3 mins. Insert a toothpick in to the batter & check if it comes out clean. If not microwave it for 1 minute.


- Allow them to cool to handle & cut them it to equal pieces.
- Heat a pan and add a Tsp. oil to it. Place 3 to 4 vadi's & pan fry them. Rotate them while frying for crisp vadi’s.
- Repeat the same with rest of them.


Serve them with chutney.

Note:
Add little more water if needed.
- You can steam cook the batter & can get the same results as microwave version.
- Microwave version consumes less time.
- Deep fry the vadi’s  instead of pan frying.