Friday, September 13, 2013

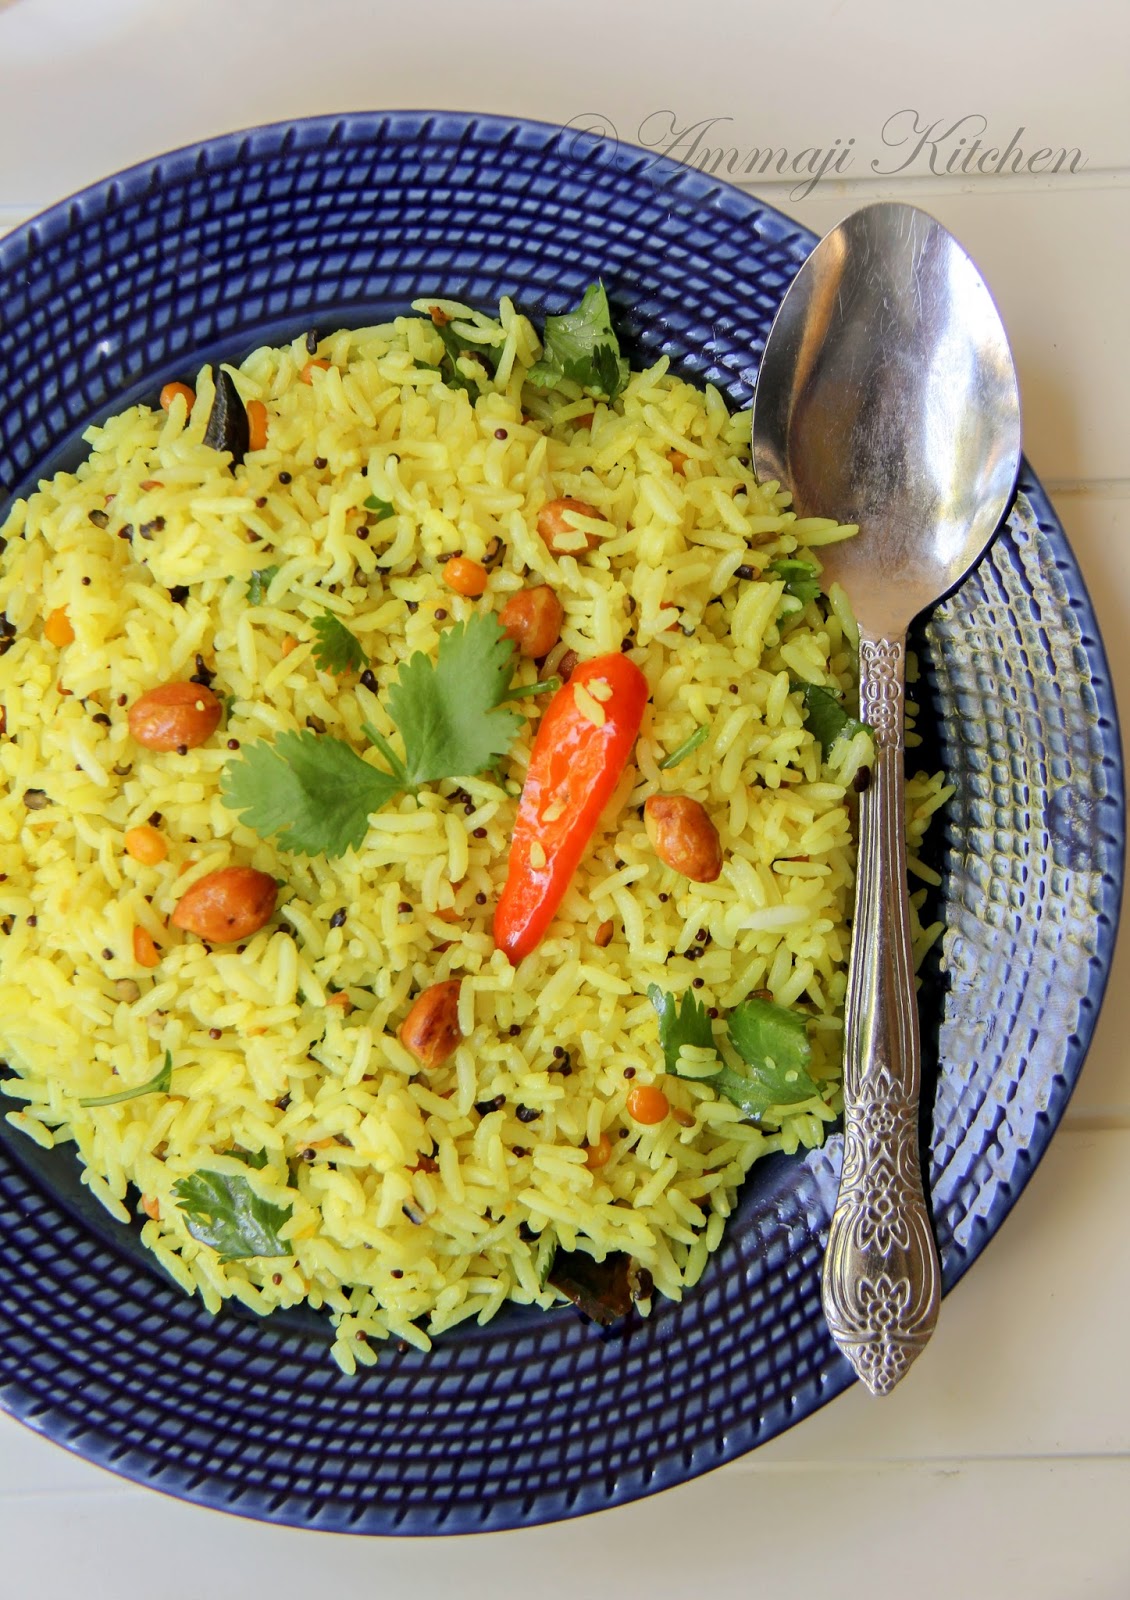
Nimmakaya Pulihora | Lemon Rice

@ Ammaji Kitchen
Lemon Rice is a most comforting & easy dish. I love to have this rice at any time of the day. Making this dish is easy & tastes very delicious too. I love this dish very much when my mom makes it. She is a good cook & I love observing her while she cooks. The simplest changes she makes to the dish do bring a lot of difference in the flavors. My mom makes this lemon rice for dinner on weekdays. She generally uses a little more of seasoning than I used here. It tastes heaven. So sharing my comfort food recipe with you all here.
@ Ammaji Kitchen
Prep Time:10mins 
Cook Time:1hr {Includes cooking rice & cooling it off}
Serves:2-3people
Ingredients 
2Cups uncooked rice /4Cups cooked rice 
4Cups water
Few curry leaves 
2Tbs oil
Juice of 2 lemons
Salt 
For Seasoning
2Tbs mustard seeds
2Tbs chana dal 
2Tbs urad dal 
1/4Cup peanuts
6Red chili's cut into half
3Green chili's slit into half
1Tbs grated ginger
2Tsp turmeric
2Tsp hing
1/4 Cup oil 
Cilantro for garnish
Directions 
- To cook rice add in rice, oil, curry leaves & water to the cooking bowl. Cook rice accordingly & cool it before making lemon rice.
- Heat pan with oil. To that add channa dal, urad dal & peanuts. 
- Allow them to fry till channa dal changes a little color. 
- Add mustard seeds, ginger, green & red chili’s to pan. Once the mustard starts jumping add hing & turmeric to pan & switch off heat. 
- Take a wide pan or plate. Add cooked rice & seasoning to it. 
- Next add lemon juice & salt little by little according to your taste. 
- Sprinkle coriander & mix it well. Taste the rice & adjust taste if needed. 
- Allow rice to sit for 30mins before you serve.  
- Serve it with your favorite chutney & enjoy.
@ Ammaji Kitchen
Note
- Cook rice according to your convenience. Electric cooker is my to go everyday & cooked rice according to it's instructions
- Using basmati rice will give a nice texture to the dish. I don't feel using basmati for south indian dish. Don't feel authentic.
- Allow the seasoning to cool before you touch it or there is a chance you might burn your hand. 
- Every lemon is different  & some have too much of juice. So add little by little as said above to avoid too much tanginess to the recipe.
@ Ammaji Kitchen
Follow me on "Facebook", "Google+", "Pinterest", "Instagram" for daily updates. Leave me a comment on any queries regarding this recipe & I will be able to answer it for you as soon as possible.


Thursday, September 12, 2013

Kothimbir Vadi / Kothimeera vadalu

Speaking of life, which is a very complicated to understand & is not so easy on us as we think. You find new challenges at your every step of life, which we have to break through to lead a good life.
Ok….Now I’m not talking philosophy here but in general that’s the truth we all have to accept.
Coming to the dish kothimbir vadi, a Maharashtra delicacy, which is made of cilantro, besan & spices, is an irresistible dish for cilantro lovers. I was planning on making them for ganesh chaturdhi festival, but ended up making them earlier than that. This version actually has garlic to it but you can just exclude if needed.


Ingredients 
2 Cups chopped cilantro/ coriander leaves / kothimeera 
2 Cups besan / senagapindi/ chickpea flour 
2 Tbs. sesame seeds 
1 Tsp. minced garlic 
1&1/2 Tsp. red chili powder ( Adjust Acc.)
1&1/2 Cups water 
1/2 Tsp. turmeric 
Salt for taste 
¼ Cup oil


- Grease a microwavable bowl with little oil. Keep rest of the oil aside for frying  vadi’s.
- In a bowl mix all the ingredients other than oil in to a thick batter.
- Pour the batter in to greased bowl .
- Microwave it for 2 to 3 mins. Insert a toothpick in to the batter & check if it comes out clean. If not microwave it for 1 minute.


- Allow them to cool to handle & cut them it to equal pieces.
- Heat a pan and add a Tsp. oil to it. Place 3 to 4 vadi's & pan fry them. Rotate them while frying for crisp vadi’s.
- Repeat the same with rest of them.


Serve them with chutney.

Note:
Add little more water if needed.
- You can steam cook the batter & can get the same results as microwave version.
- Microwave version consumes less time.
- Deep fry the vadi’s  instead of pan frying.

Wednesday, September 11, 2013

Panasa Kaaya Koora | Jackfruit Curry | Chakka Curry

Raw jackfruits/ Panasa kaya are hard to get here in US. I have seen them couple of times @ Indian grocery in summer & rest of the year I manage with the canned once. If your experimenting on a raw jackfruit you need to oil your hands & knife before cutting it. The fruit releases some sticky milk & it's hard to get rid of your hands. Canned once are easy to handle & less mess. Taste wise the real fruits are the best rather than a canned one. 
Check for the recipe I have shared "Panasa pottu koora" an Andhra delicacy, will make you hungry for more. 


Ingredients 
1&1/2 Cup chopped raw jackfruit
1 Cup sliced onions
5 Cups water
1 Tbs. lime juice
1/2 Tsp. turmeric powder
1/2 Tsp. oil
For coconut masala
1/2 Cup chopped coconut pieces 
4 Green chili's 
1 Tbs. jeera
Salt for taste
For seasoning 
1 Tsp. mustard seeds
1 Tsp. jeera
1 Tsp. channa dal 
1 Tsp. urad dal 
3 Red chili's (Broken in to equal pieces)
1 Tbs. oil 
4 Curry leaves


Take a big vessel with 5 cups water. To that add jackfruit, oil & turmeric. Bring them to boil & cook for 10mins. Switch off heat & allow to cool. Filter excess of water & grind coarsely.
Coarse grind coconut, jeera, chili's & salt. 
Seasoning
Heat a pan with oil. Add channa & urad dal to pan. Once they start changing color add mustard, jeera & red chili's to pan. Mustard starts jumping & to that add curry leaves. Now add onions to pan & saute them.  Once the onions are translucent add jackfruit to pan. Add the coconut mixture & saute for 5mins.Switch off heat & last mix the lime juice to curry. 
Serve with rice. 

Note : 
1. You can pressure cook jackfruit for 1 whistle instead of boiling it. 


Tuesday, September 10, 2013

Italian Pasta Salad

Last week this time we were experiencing high temps, but today to our surprise the temperature has taken down lane & it's all pleasant and cool. Keeping the temps aside last few days have been very busy. I was feeling so lazy to resume things where I have stopped. Decided to make myself useful I took cooking as my option. With the cool temps & being rejuvenated I decided to bake some goodies for my coming post. 
For todays post I went front & back with different options & later settled on this salad. This salad is easy to make & keeps you full. Try making it & I'm sure you will enjoy it.


Ingredients
1 Cup cooked pasta 
1/2 Cup corn 
1/2 Cup grated carrot 
2 Tbs. chives 
2 Tbs. scallions
1 Tsp. oil
For Honey Lime Vinaigrette
1/4 cup lime juice 
2 Tbs. honey 
1 Tbs. olive oil 
1 Tsp. black pepper powder 
Salt for taste


For cooked pasta follow the packet instructions. Generally I take a vessel full of water & the vessel size depends on the quantity of pasta. So bring water to boil with pinch of salt. To that add the pasta & cook it. After 10mins check if the pasta is cooked. Switch off heat & strain the pasta. 
Heat a pan with oil. Once it's hot add the corn & saute it till corn fry's well as above. Now switch off heat & keep aside.


Vinaigrette
In another bowl add lime juice, honey, olive oil, pepper powder & salt. Whisk together & keep aside.
Making Salad 
Take a bowl to that add cooked pasta, corn, carrots, chives & scallions. Now add the vinaigrette to bowl & mix them well.


Serve as a side with lasagna or as you wish.
***My Hubby finished the whole bowl & demands for more.. :)
His comments are it's spicy,sweet & yum.

Note: 
- The vinaigrette I used was yummy. If you like to play around you can use any other vinaigrette.  
- Add more veggies for more healthier salad. 

Monday, September 9, 2013

Eggless Honey Oatmeal Blueberry Cookies

Cookies, cakes, deep fried dishes are never my choice of dishes. I know it's very hard to resist them so I try to avoid making them. Today I’m sharing one of those recipes, which uses less sugar & butter in making. If you have observed I normally replace butter with vegetable butter, which reduces at-least some of the calories in a dish.


Yeilds :12 cookies
Ingredients
1/2 Cup old fashioned oats
1/2 Cup all-purpose flour
1/2 Cup brown sugar
3/4 Cup blueberry raisin
Pinch of salt
1/2 Tsp. baking soda
1/2 Cup butter @ room temperature
1/4 Tsp. vanilla extract
1 Tbs. water / milk ( As needed)


- Preheat oven @350 degrees. Layer your pan with baking sheet
- In a bowl mix all the wet ingredients & whisk them. Now in another bowl sift flour & to the same bowl add oats, raisins, salt & baking soda.
- Now little by little add the dry ingredients to to wet ingredients. Add little milk / water as needed to make a ball of dough.
- Now divide the dough in to equal ball & arrange them on the pan. Pat them to get a round shape.


- Bake them @ 350degrees for 20mins or more if needed. They should look brown & crisp.
- Remove from oven & allow them to cool. Store them in a air tight container for future enjoyment.
Serve them with coffee or milk.


Note:
- Don't add too much water / milk. It might make your dough runny.
- Add another 1/4 cup brown sugar if you need a little sweet one's.
- You can replace blueberries with raisins & dried cranberries too.

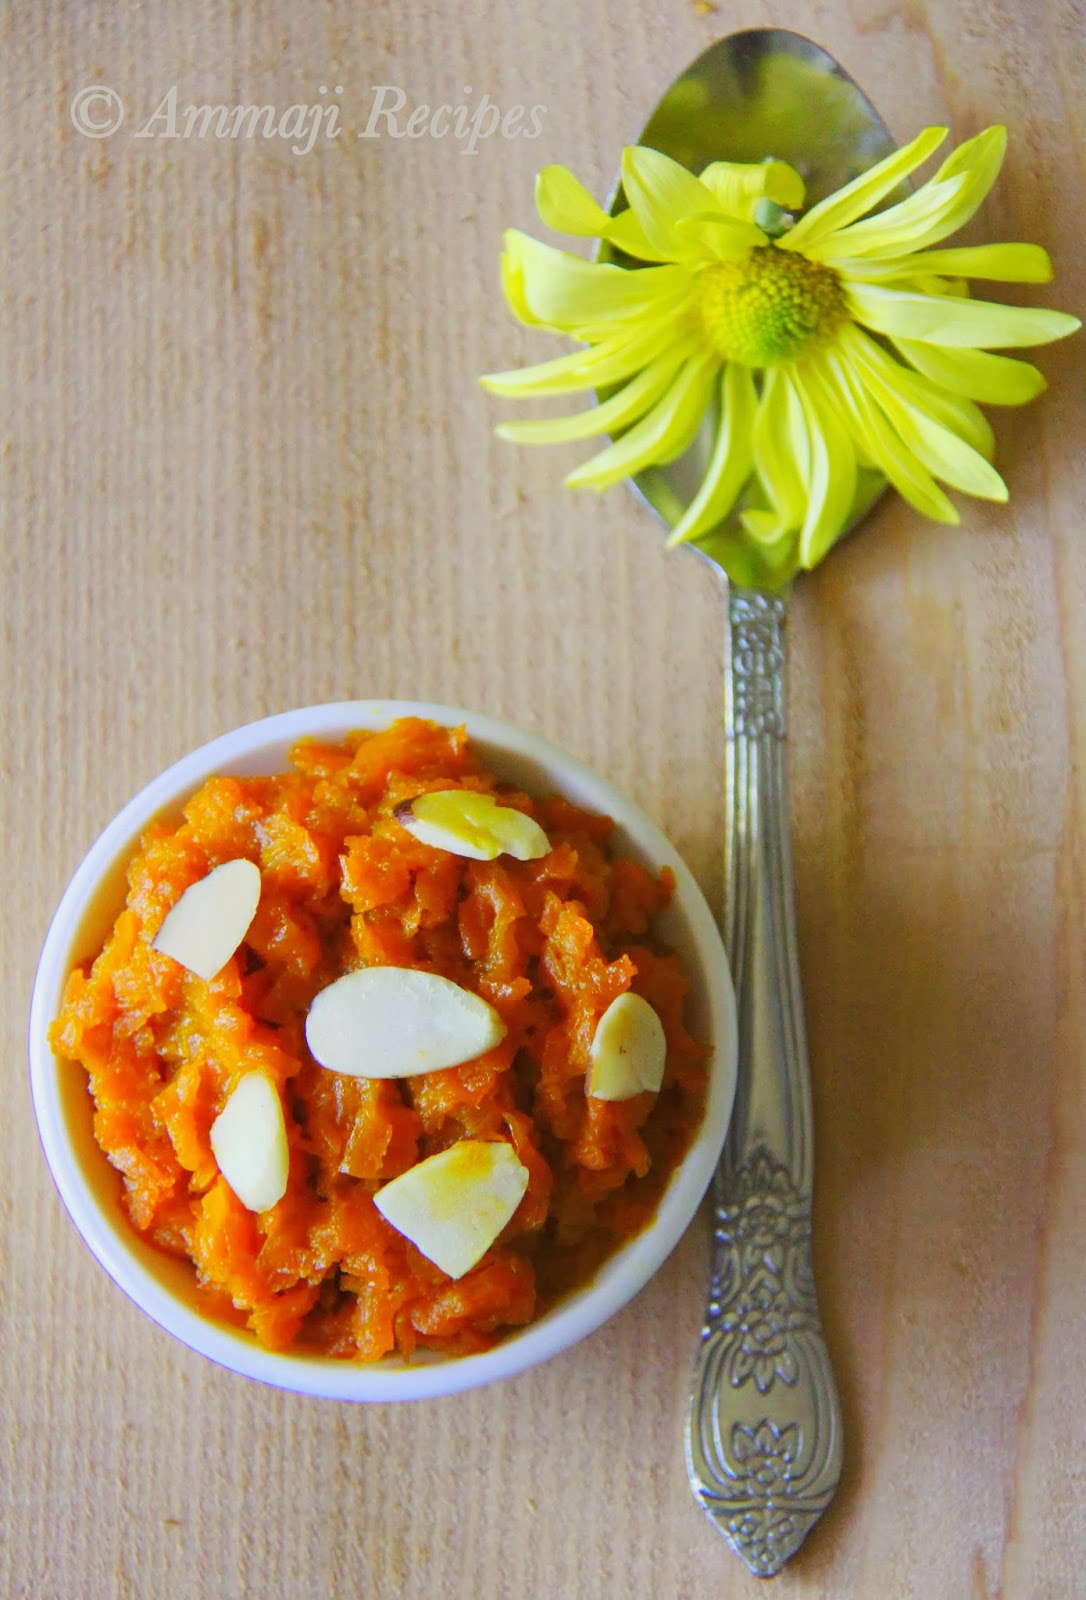
Gajar Ka Halwa | Carrot Halwa (Lite Version)

Happy Ganesh Chaturdi to All. Hope you all had a fun filled festival this year. Here is a glimpse of our little ganesha. 


On the occasion festival here I'm sharing a sweet delicacy "Gajar Ka Halwa". The specialty of this recipe is it consumes very less time in making & a yummy sweet will be ready soon.


Source : Tarla dalal
Yields : 2 Servings
Ingredients
2 Cup grated carrot
4 Tbs. coconut mik
1/4 Cup water
3 Tbs. sugar
3 Tbs khoa/khova (Optional)
2 Tbs. olive butter
1 Tsp. elachi/cardamon powder
1 Tbs. chopped almond
5 Cashew nuts (optional)


-In a pressure cooker add 1 Tbs. butter & to that add carrot. 
- Sauté it on low heat for 5mins. This will help in removing the raw smell of carrot. 
- Now add milk & water to carrots. Pressure cook for one whistle & switch off heat. 
- Allow the pressure to release before opening the cooker. 
- Heat a pan with butter. To that add almonds & cashew nuts to it. 
- Fry them till they change to light brown color. Now remove them on to a plate. 
- Now transfer the carrot mixture to pan along with sugar. Cook on medium heat. 
- Allow halwa to come together. It takes 5 to 7Mins to that. Add cardamon powder to halwa & switch off heat. 
- Now mix the fried nut to halwa. Allow it to cool before serving.


Serve warm along with a scoop of vanilla ice cream. 

Note: 
1. Adjust the sweet according to your requirement. 
2. Adding khova/Khoa is optional. I didn't use it in my recipe.