Showing posts with label Blogging Marathon. Show all posts

Saturday, June 7, 2014

Coriander Peanut Chutney


Coriander Peanut Chutney is a delicious chutney accompanies well with any South Indian Tiffins & also pairs well with rice too. In this chutney peanuts are the star & they can be felt in every bite along with other ingredients. This is a mildly spiced chutney & can be adjusted as per your requirements. 

Prep Time-10mins | Cook time-10mins | Serve-3people
Ingredients
1/4Cup peanuts
2Cups chopped cilantro / 1Bunch coriander leaves
2Tomatoes chopped
2Green chili's sliced
2Red Chili's
2Garlic cloves chopped
1Small onion chopped
1Tbs oil 
Seasoning 
2Tsp oil
1/2Tsp mustard 
1/2Tsp jeera
2Red chili's 
Directions 
- Heat pan with oil, peanuts & red chili's. 
- Fry peanuts till they turn light brown. 
- Transfer peanuts & red chili's to a bowl. 
- To the same pan add onions, garlic & green chili's. 
- Fry them on medium heat & to pan add tomatoes.
- Cook for 2mins or till tomatoes are just soft enough. 
- Now add in cilantro to pan & cook for 2secs. {Don't over cook cilantro}
- Switch off heat & allow it to cool. 
-  Now grind peanuts & red chili's to a smooth paste.
-  Next add the veggies & grind them smooth chutney. 
- Heat a pan with oil & to that add mustard, jeera & red chili's. 
- Once mustard starts jumping add seasoning to chutney. 
- Serve chutney with Idli, dosa & vada or enjoy it as you like.
Note
- Add little water if needed while grinding. 
- Add cilantro to pan before switching off heat. 
- You can add a little tamarind for a much tangy taste. 


Follow me on "Facebook", "Google+", "Pinterest" for daily updates. Leave me a comment on any queries regarding this recipe & I will be able to answer it for you as soon as possible.


Wednesday, June 4, 2014

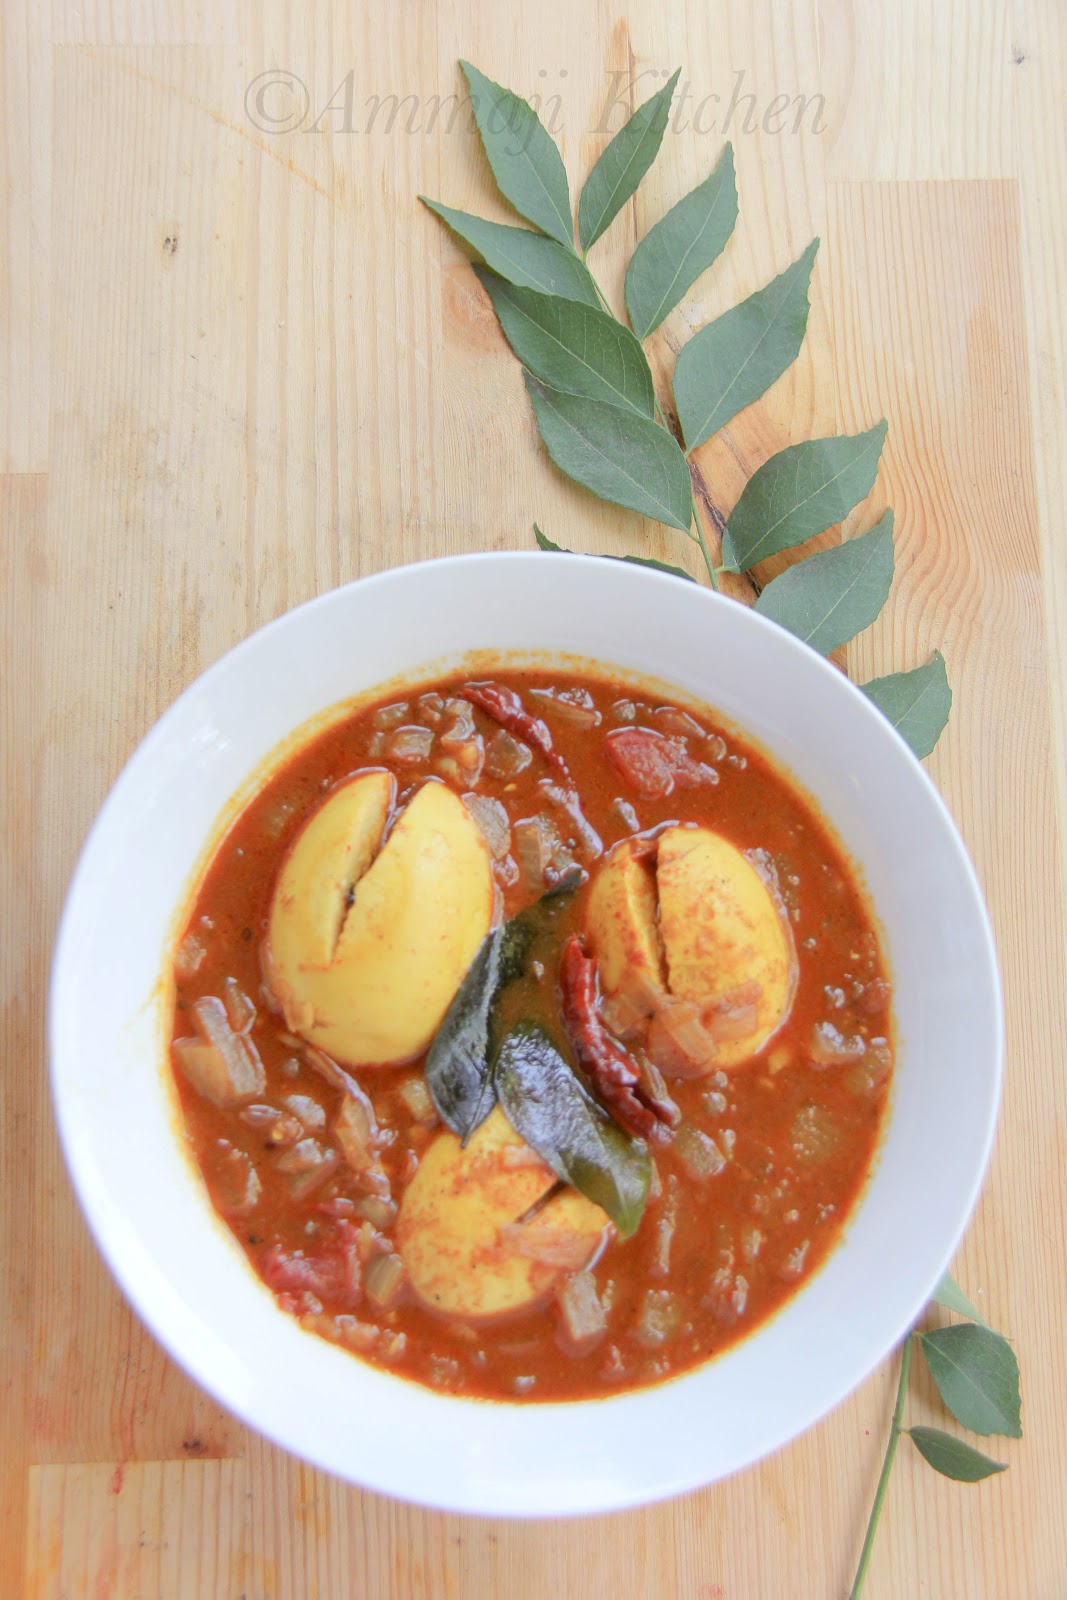
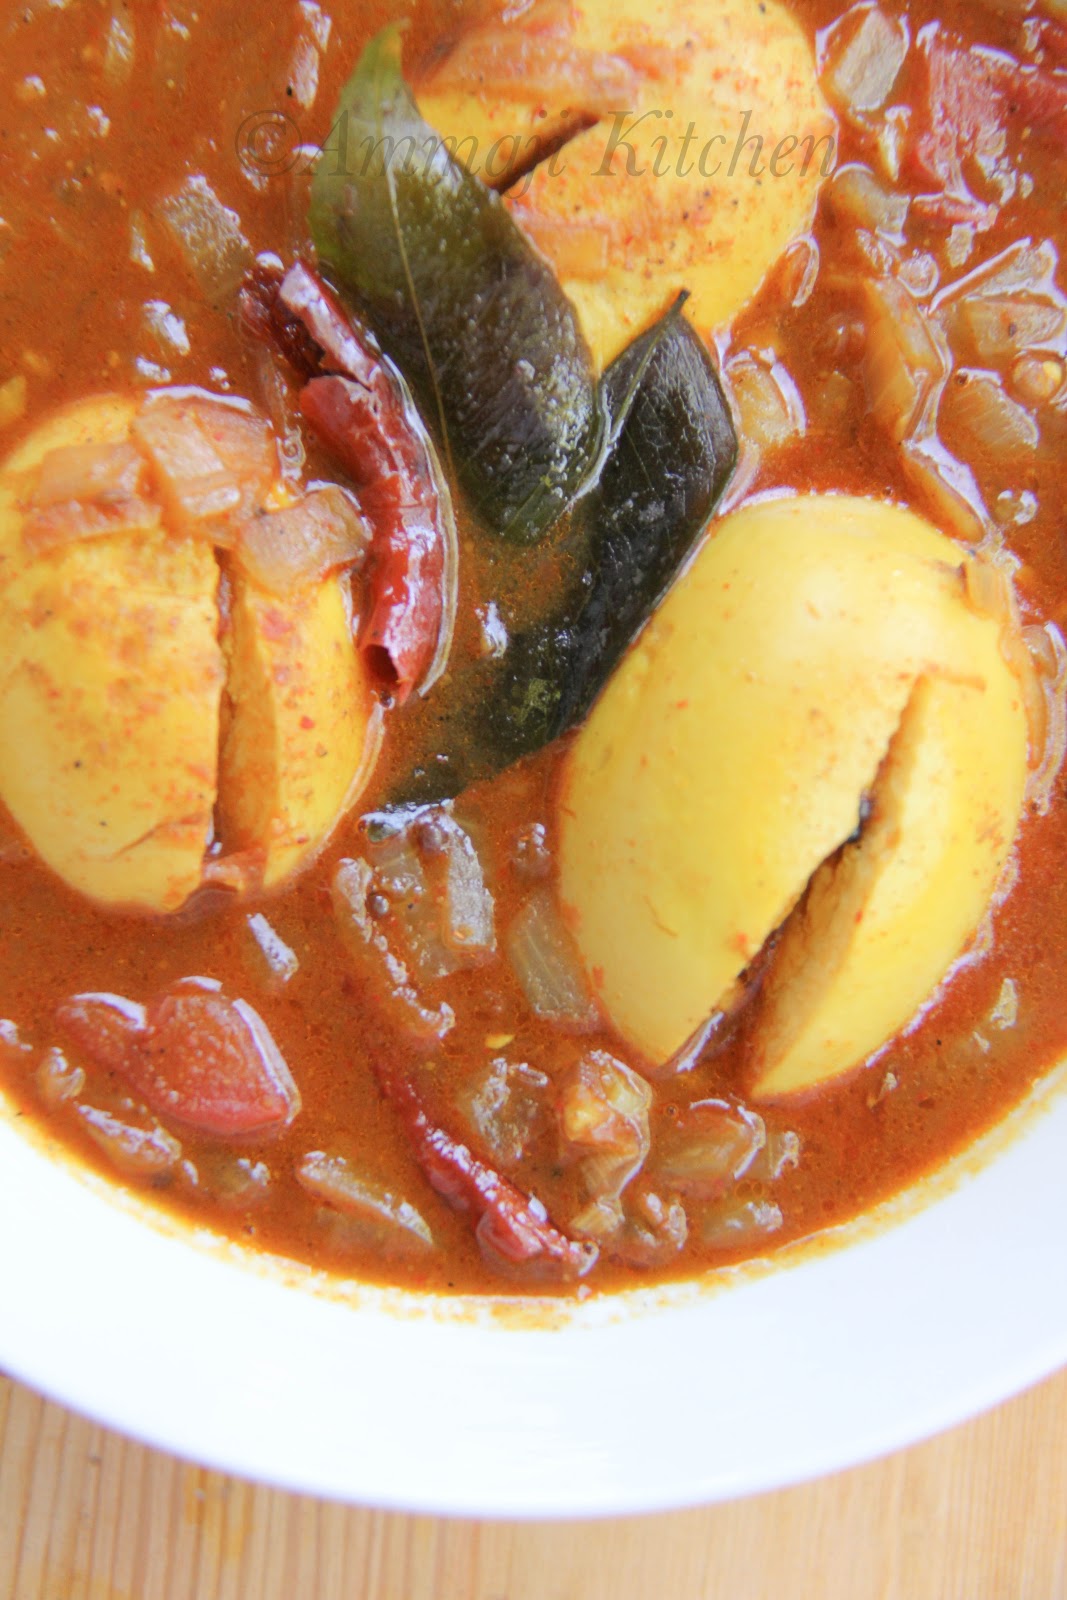
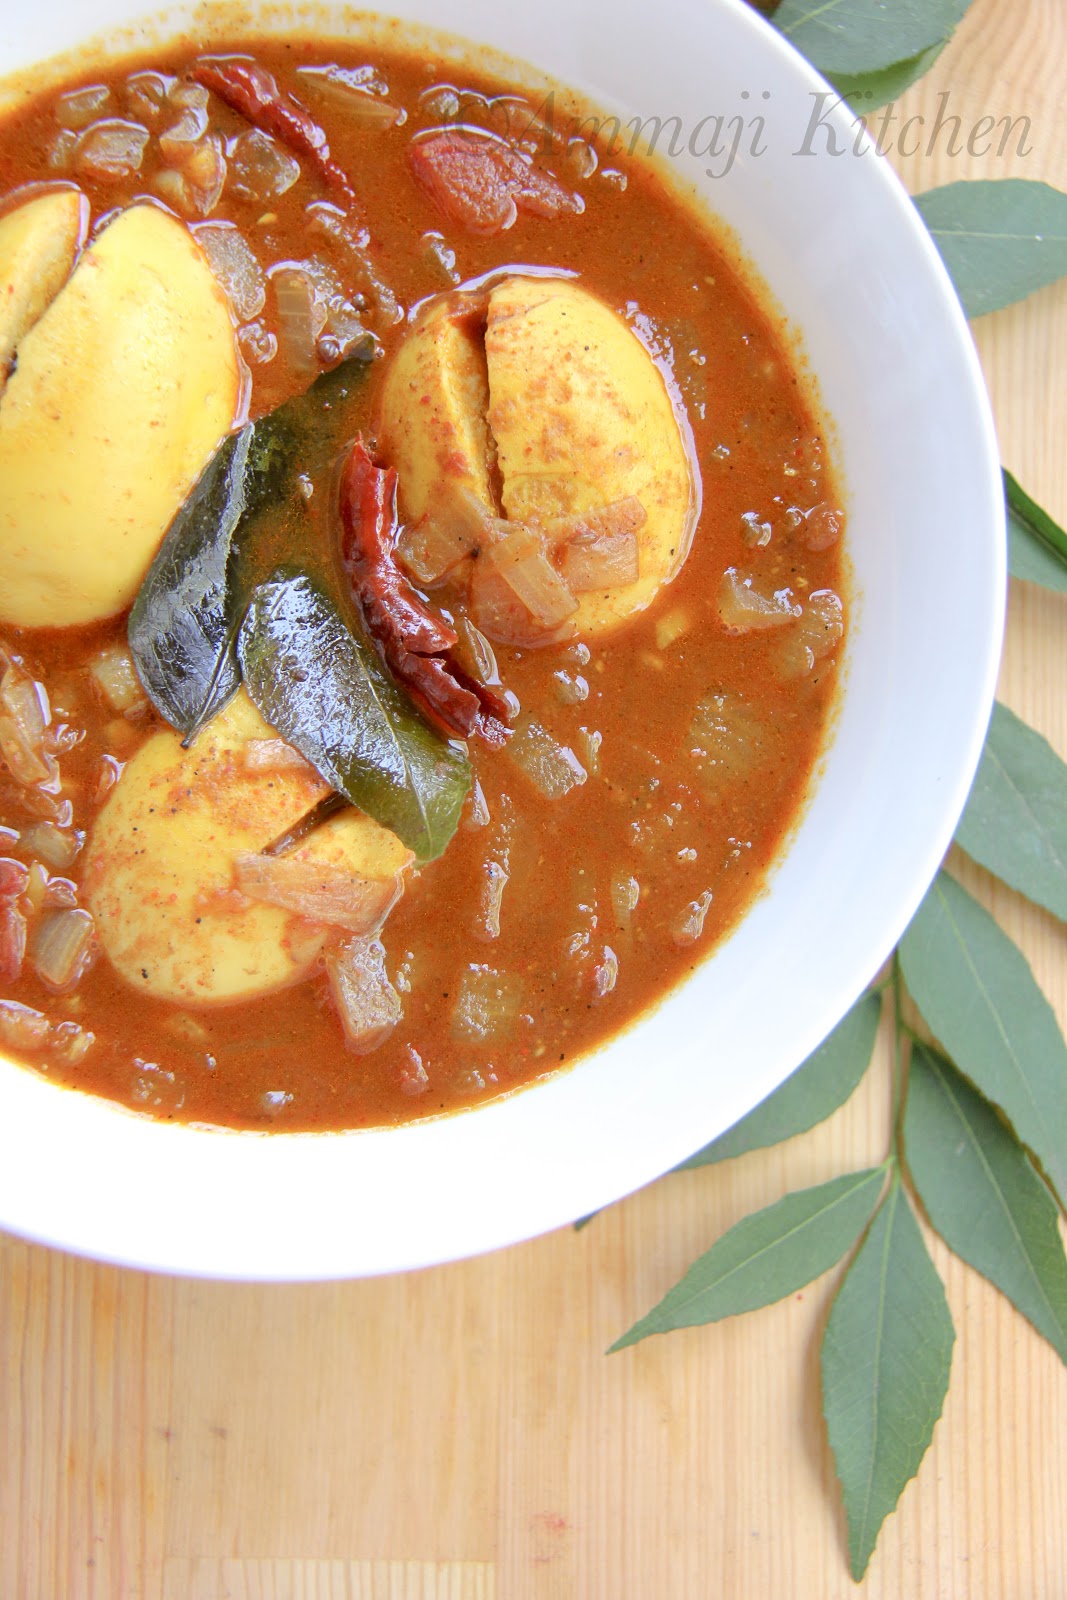
Egg Pulusu | Kodi Guddu Pulusu

Egg Pulusu

Egg Pulusu is spicy tangy dish from Andhra Pradesh. Gravy for this dish is simple & very basic. Eggs are the star of this dish & when you use a fried egg the texture of it will make this dish much tempting. 


Egg Pulusu
Prep Time-10mins | Cook Time-30mins | Serves-2people
Ingredients
4Eggs boiled
1Onion finely chopped
1Tomatoes chopped
2Garlic cloves sliced
2Green chili's sliced half
Few curry leaves
1/2Tsp turmeric
1Tsp Red chili powder {Adjust as needed}
1Tbs Tamarind pulp
1Tbs pulusu powder { Use coriander cumin powder}
1&1/2Cup water
1/2Tsp sugar
1Tbs oil
Salt to taste
To Fry Eggs 
1Tsp oil
1/4Tsp turmeric
Seasoning
1Tbs oil
1Tsp jeera
1Tsp mustard seeds
2Red chili's cut equally
1/2Tsp hing {asafetida}
Few curry leaves
Egg Pulusu
Directions
- Heat pan with 1Tbs oil. 
- Add garlic & onion to pan. Fry for few seconds. 
- To the pan add tomatoes, green chili & curry leaves. 
- Close it with lid & cook till tomatoes are soft. 
- Mean while heat pan with 1Tsp oil. Add turmeric & boiled eggs to pan. Fry them on both sides to light brown.
- Once tomatoes are soft add water, tamarind, pulusu powder, turmeric, sugar & salt.
- Check salt & spiciness in the dish. Add chili powder as needed. 
- Slit fried eggs in the middle & drop them in to tamarind gravy. Bring gravy to boil & keep cook it for another 5mins. Switch off heat.
- Heat a small pan with oil. 
- To that add mustard, jeera & red chili's. 
- Once the mustard jumps add hing & curry leaves to pan. 
- Switch off heat & add seasoning to pulusu.
- Serve it with rice & a dollop of ghee.
Note
- Ignore the pulusu powder if you want to. 
- Gravy should be little thick & shouldn't be like watery. 


Egg Pulusu
Follow me on "Facebook", "Google+", "Pinterest" for daily updates. Leave me a comment on any queries regarding this recipe & I will be able to answer it for you as soon as possible.

Tuesday, June 3, 2014

Rasam | Charu | Saaru | How to Make Rasam


Rasam is a well known South Indian dish & without it the meal is never complete. This is a comforting simple dish which is healthy, appetizing & helps with good digestion.
Rasam has many variations, based on the region & state. I'm sharing my mom's rasam recipe, which is little sweeter & tangier. Curry leaves & Coriander leaves or any one these leaves will add a lovely flavor to the dish. 
Rasam powder is the main ingredient in this dish. This powder is packed with flavors from different herbs & which are released in to rasam when it is added. Adding rasam powder at initial stage will make this much flavorful. 
Other rasam dishes
Pappu Charu | Toor Dal Rasam
Ulava Charu | Horse Gram Rasam | Hurali Saaru | Kollu Rasam


Prep Time-5mins | Cook Time-30mins | Serves-3people
Ingredients
2Tomatoes finely chopped
3Cups water 
2Tsp rasam powder
2Tsp tamarind pulp / Small ball of tamarind {adjust as needed}
1/4Tsp turmeric
2Tsp jaggery powder / 1Tsp sugar {adjust as needed}
Few curry leaves 
Salt to taste
Seasoning 
1Tsp mustard 
1Tsp jeera
Few methi seeds
1Tbs butter/oil
1/2Tsp hing {Asafetida} 
2Garlic cloves chopped
Directions 
- Take a vessel with water & to that add tamarind pulp & dissolve it completely. 
- If using the tamarind as itself, wash with little water & them soak it in 1cup of water for 30mins or till it gets soft. Squeeze water out of tamarind & use it part of 3cups water. Adjust the flavor as needed.  
- To that add turmeric, curry leaves & chopped tomatoes. 
- Add salt, rasam powder & bring to boil. Cook till tomatoes are soft & perfect. 
- Now add sugar & adjust salt if needed. {Don't switch off heat}
- Heat pan with butter. 
- Add mustard, jeera & methi seeds to pan. 
- Once the mustard starts jumping add hing & garlic. 
- Switch off heat mix it to boiling rasam. 
- Switch off heat to rasam.
- Serve with rice & dollop of ghee. 
Note
- You can add both curry & cilantro leaves to the boiling rasam. 
- Don't over boil the rasam. 
- Once the tomatoes are done, it means rasam is ready.
- You can add tomato puree instead of sliced tomatoes.


Follow me on "Facebook", "Google+", "Pinterest" for daily updates. Leave me a comment on any queries regarding this recipe & I will be able to answer it for you as soon as possible.Check out the Blogging Marathon page for the other Blogging Marathoners doing BM# 41


Wednesday, May 28, 2014

Pav | How to make Pav


Pav is Indian yeasted bread. The most famous snacks include pav bhaji, Vada pav, misal pav, masala pav etc..
Origin - This bread “Pao” was introduced by Portuguese when they ruled Goa {India} in 15th century. Later in migration it this bread was brought to Mumbai & it became famous over there. {Sources: Holiday Goa}
Recipe - The recipe is simple & doesn't involves eggs. I used milk in this recipe instead of water & kneaded it for 10mins before & after rising. Making small dough balls will allow the bread to be soft & smooth after it was baked.

Prep Time-3hrs | Cook Time-30mins | Serves-3people | Yields-7pav's
Ingredients
1&1/2Cups all purpose flour {unbleached}
1/2Cup + 2Tbs milk { add as needed}
2Tsp instant yeast
1/4Tsp salt
1Tbs +2Tsp sugar
1Tbs butter melted
1Tbs flour for dusting
1Tsp butter {baking pan}
1Tsp olive oil {rising bread}
1Tsp milk {brushing on the pav}
Directions
Making Dough
- Grease a bowl with olive oil & set aside.
- In a bowl add flour, yeast, salt, sugar & butter.
- To that add milk little by little & mix well.
- Knead dough for 10mins.
- Form a dough & place the dough in greased bowl.
- Cover up & keep it in a warm place.
- Allow it to raise for 1&1/2 hrs.
Make Pav
- Grease a baking pan with butter.
- Dust a wooden board with flour & place the risen dough.
- Punch out all the air & knead dough for 5mins.
- Divide the dough into equal size small balls.
- Place them in the baking sheet leaving a little space in between.
- Cover up & allow the bread to rise for 1&1/2hr.
Baking
- Pre heat oven @350degrees for 10mins.
- Brush dough with milk & place them in oven.
- Bake @350degrees for 30mins or till the pav are brown on top.
- Remove from oven & brush some butter to them.
- Allow them to cool before serving.
- Serve as you like.
Note
- Use a bigger bowl for rising dough.
- If dough comes out sticky add some flour & knead the dough. 
- If the place is too warm the risen dough will smell like yeast. 
- Don't exceed the rising time of bread, or it will smell like yeast.

Follow me on "Facebook", "Google+", "Pinterest" for daily updates. Leave me a comment on any queries regarding this recipe & I will be able to answer it for you as soon as possible.Check out the Blogging Marathon page for the other Blogging Marathoners doing BM# 40.


Sunday, May 25, 2014

Grissini - Italian Breadsticks | How to Make Grissini


Grissini is an Italian bread, which look thin, Long & crispy to bite. These breadsticks can be served as appetizer & will go perfect by them selves. You can mix & match with your favorite dips when serving.

Prep Time-15mins + 1hr {Making dough + Dough rising} | Cook Time-20mins | Yields - 14sticks | Serves- 2people
Adapted from : The Kitchn
Ingredients
3/4Cup all purpose flour
1/4Cup + 1Tbs warm milk
1Tsp instant yeast
1Tbs sugar
1/4Tsp salt
2Tbs butter {@room temperature}
2Tbs sesame seeds for coating
Some oil to grease bowl
Some all purpose flour for dusting
Directions:
Making the dough
- Grease a bowl with oil & keep aside.
- In another bowl mix take flour, yeast, sugar, salt, butter & last add warm milk.
- Using a wooden spoon mix all the ingredients to a smooth dough.
- Dust the wooden board with some flour & knead dough for 10mins.
- Now put the dough in the greased bowl & coat the dough with oil.
- Wrap it with a cloth & keep it in a warm place.
- Allow the dough to rise for 1hr or double it's size.
Baking the sticks
- Preheat oven @350 degrees.
- Prep the cookie sheet with a parchment paper.
- Dust the wooden board with flour & place the risen dough.
- Knead it for few seconds & divide the dough in to 20 small balls.
- Take one ball of dough & roll it into straight, thin stick using your hand.
- Now roll it in sesame seeds & lay on the cookie sheet.
- Repeat the same with rest of the dough balls.
- Now lay them equally on the cookie sheet & allow them to rise for 20mins.
- Bake them @350 degrees for 10mins or till they turn light brown.
- Remove from oven & cool them.
- Serve them with your choice of dip & enjoy.
Note
- I used instant yeast so there was no rising ceremony for it.
- If using active yeast follow the packaged instructions.
- I ended up having a little fat bread sticks after the bread rose.. So roll them little more thinner for sleek sticks.
- I haven't added any flavor to dough. Feel free to customize the dough.
- This recipe was perfect for two.

Follow me on "Facebook", "Google+", "Pinterest" for daily updates. Leave me a comment on any queries regarding this recipe & I will be able to answer it for you as soon as possible.

Check out the Blogging Marathon page for the other Blogging Marathoners doing BM# 40


Monday, May 12, 2014

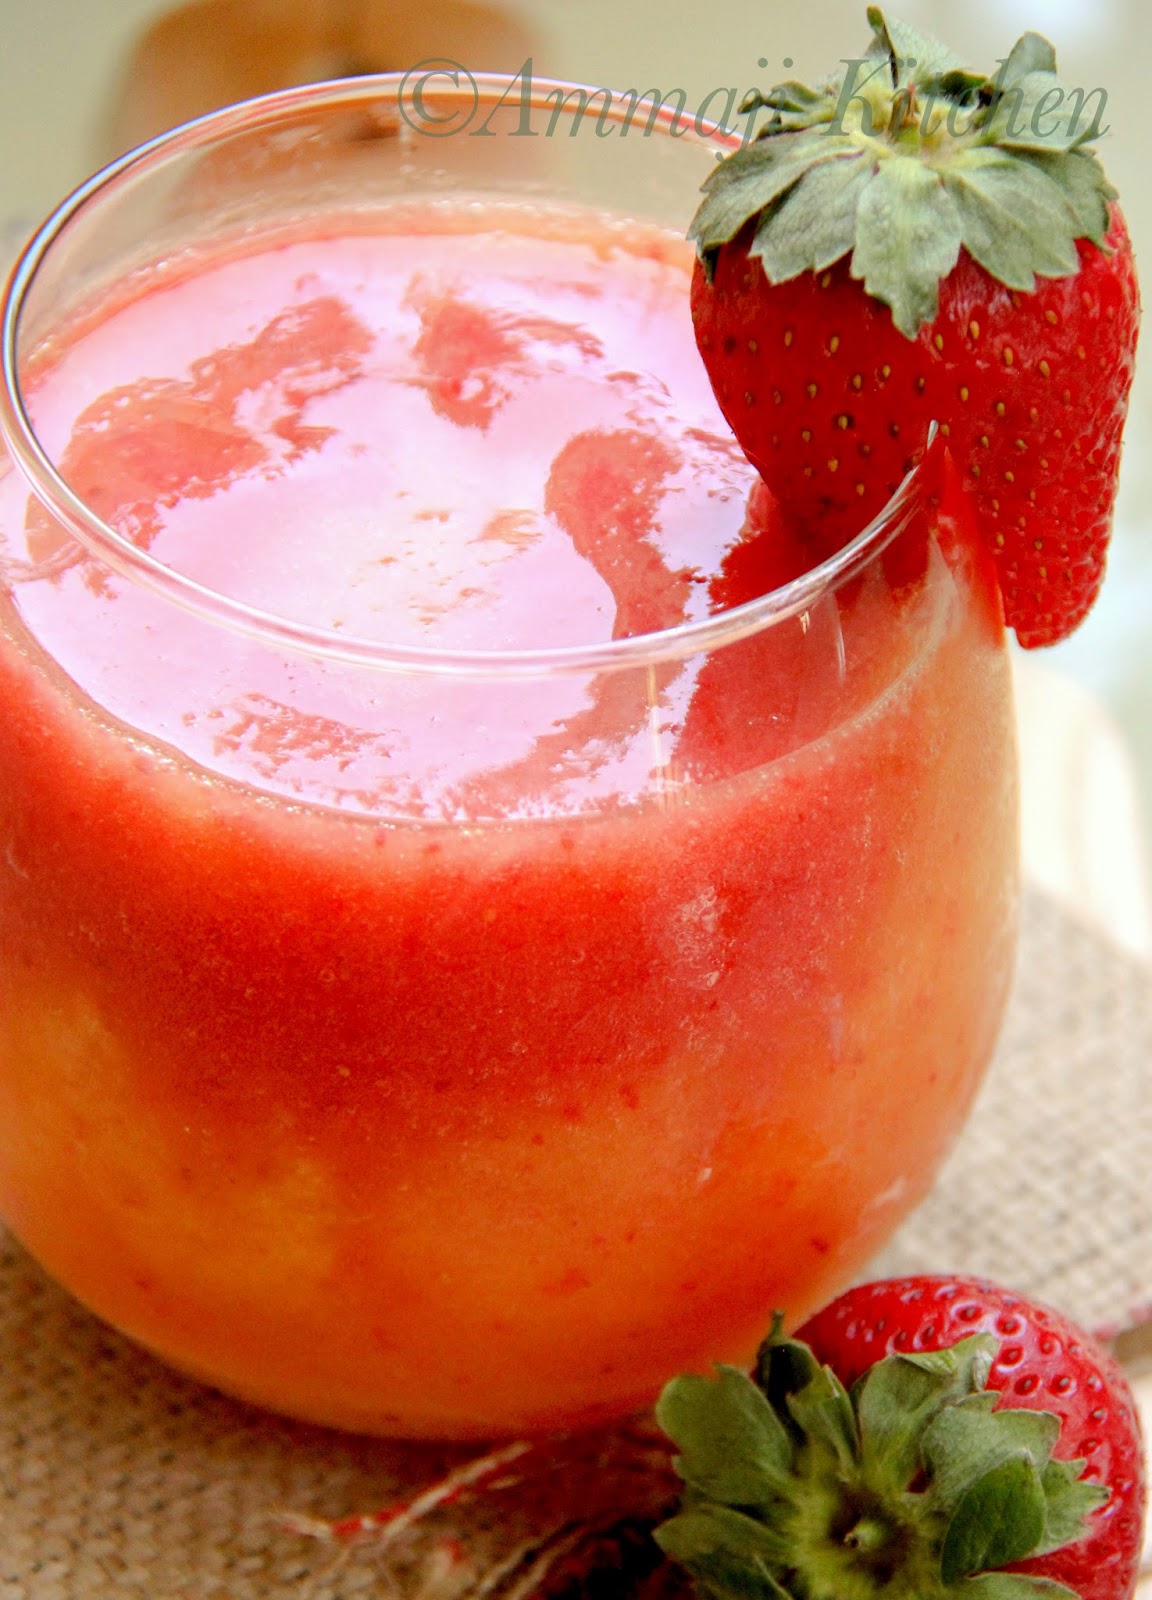
Mango Strawberry Punch

Mango Strawberry Punch

Mango's aren't my favorite fruit. Back home, while growing up at my parents's place we were surrounded by mango trees. But I never liked them to heart & never felt the urge to have this fruit.
So to reduce my unlikeliness towards this fruit I blend it with other fruits, which are much sweeter & can balance the taste of this fruit. The drink I'm sharing is well balanced with flavors & also energy boosting. 
Enjoy the drink !!!

Mango Strawberry Punch

Prep Time-10mins | Serves - 3-4people
Ingredients 
3Cups mango juice
12Strawberries {frozen or fresh}
3Oranges juiced 
2Tbs honey /agave {optional}
Directions
- Blend all the above other then honey. 
- Flavor up with honey if needed.
- Chill & serve {or} add few ice cubes & serve right away.
Note
- I used store bought mango juice. 
- Quantity might change if used mangoes.
- I haven't used honey in my drink. 


Mango Strawberry Punch
Follow me on "Facebook", "Google+", "Pinterest" for daily updates. Leave me a comment on any queries regarding this recipe & I will be able to answer it for you as soon as possible.
Check out the Blogging Marathon page for the other Blogging Marathoners doing BM# 40


Saturday, May 10, 2014

Cantaloupe Ginger Mocktail


Cantaloupe Mocktail  is a blend of fruit juice along with ginger syrup & lemon juice. This mocktail twisty in flavor & refreshing. 


Prep Time -30mins | Serves - 3to4people
Ingredients
1Cantaloupe / 3&1/2Cups juice
Big piece of chopped or minced ginger / 4Tbs big chunks of ginger 
1/2Cup water
2Tbs lemon juice
2Tbs sugar
Few mint leaves for garnish
Directions 
- Boil water along with sugar & ginger.
- Dissolve sugar completely & switch off heat. 
- Allow it to cool completely & filter out ginger from syrup. 
- Now stir in cantaloupe juice with lemon juice & sugar syrup. 
- Chill & serve with garnish or serve right away with few ice cubes. 
Note
- I used minced ginger & loved the flavor it gave to the mocktail. 


You might also like
Watermelon Mocarita | Watermelon Mocktail
Lemonade | Nimbu Pani

Apple Milkshake with Almond Milk
Mango Lassi | Mango Smoothie
Mexican Hot Chocolate
Banana Nutella Milkshake
Iced Orange Tea


Follow me on "Facebook", "Google+", "Pinterest" for daily updates. Leave me a comment on any queries regarding this recipe & I will be able to answer it for you as soon as possible.
Check out the Blogging Marathon page for the other Blogging Marathoners doing BM# 40

Friday, May 9, 2014

Watermelon Mocarita | Watermelon Mocktail


Watermelon Mocktail

Mock-tails are non- alcoholic drinks that are made of mixing different juices. You can modify many cocktails in to mocktails by omitting alcohol from them.
Watermelon Mocarita is a mocktail, which is somewhat similar to non-alcoholic blend of margarita. In this drink I mixed watermelon juice with lemon juice & flavored it with salt. You can replace salt with sugar but for me it was perfect & refreshing with salt.
Enjoy the drink!!!

Watermelon Mocktail
Prep Time - 45mins {cooling + making} | Serve - 3 - 4people 
Ingredients
3Cups watermelon / 6Cups cubed watermelons 
1/2Cup water {optional}                                       
2Tbs lemon juice
1/2Tsp salt
Few small watermelon pieces to garnish
Directions
- Extract juice of watermelon cubes using a juicer. 
- Filter the juice to remove pulp. 
- Stir in water, lemon juice & salt. If needed adjust them as you like.
- Chill & serve with few watermelons on top or you can serve right away with few ice cubes. 
Watermelon Mocktail

Note
- I diluted watermelon as I'm not a big fan of the taste. 
- You can omit water if you don't want to.


Watermelon Mocktail
Follow me on "Facebook", "Google+", "Pinterest" for daily updates. Leave me a comment on any queries regarding this recipe & I will be able to answer it for you as soon as possible.
Check out the Blogging Marathon page for the other Blogging Marathoners doing BM# 40