Showing posts with label Mega Marathon. Show all posts

Tuesday, September 23, 2014

Bulgar Pilaf ~ Turkish Dish

Bulgar Pilaf
Bulgar Pilaf is a traditional Turkish dish consists of durum wheat or dalia, veggies & spices to flavor it up. It is a healthy dish that consumes less time & efforts in making it. Bulgar Pilaf is served as a side dish to kebabs or any  
Bulgar, the main ingredient or the hero of this recipe tastes nutty in flavor & it is also very high fiber. Bulgar is sold par-boiled & dried in stores which makes it easy to cook. In Turkey the coarsen bulgar is used in making pilaf & the soft grounded makes a tasty tabbouleh salad & a delicious kibbeh.
There is a middle eastern restaurant that we love to visit on regular basis & they serve tofu kebabs along with bulgar pilaf & a Mediterranean salad. I felt this recipe was tasting very similar to the pilaf they serve. Enjoy this filling dish.
To know what my other friends are cooking, check out the Blogging Marathon page for the other Blogging Marathoners doing BM# 44
Bulgar Pilaf
Prep Time-10mins | Cook Time-20mins (max) | Serves-2people
Ingredients
1/2Cup bulgar wheat
1Cup water
1Small onion chopped
1Garlic minced
1Carrot chopped
1Bell pepper chopper
1Tbs tomato paste
1inch cinnamon stick
1Tsp fresh black pepper / chili powder {Used red chili powder}
Salt to taste
2Tbs oil
Cilantro & lemon for garnish
Directions
- Heat pan with oil. To that add onions, garlic & cinnamon stick. Cook till onions are translucent.
- Next add in carrots & bell pepper. Stir it once.
- Next add in bulgar & fry for few seconds.
- Then add in tomato paste, water, salt & chili powder. Mix them & close with a lid.
- Cook on low flame till the bulgar is cooked completely. Adjust taste if needed. Switch off heat.
- Garnish with cilantro & lemon.
- Serve with raita of your choice.
Note
- You can replace wheat to bulgar.
- Customize this with your choice of veggies.
Bulgar Pilaf

Follow me on "Facebook", "Google+", "Pinterest" for daily updates. Leave me a comment on any queries regarding this recipe & I will be able to answer it for you as soon as possible.


Monday, September 22, 2014

Tortilla De Patatas | Spanish Omelette

Tortilla De Patatas
Tortilla De Patatas is a Spanish potato omelette, a speciality of Spain, which is filling & tempting. This is a picnic dish in Spain, which is served in to bite size cubes & served with cock tail sticks, but you can also make this dish for breakfast & as brunch for lazy weekends.
Potatoes & onions are the vegetables I used as it was authentic. You can add your choice of finely chopped vegetables in additions to potatoes & onions. 
We Indians love our food to be little spicy & when it comes to me I love food much spicier than the normal limits. Tortilla De Patata is very mild in taste, so to satisfy my taste buds I added a pinch of chili powder along with black pepper to make it spicy.
To know what my other friends are cooking, check out the Blogging Marathon page for the other Blogging Marathoners doing BM# 44
Tortilla De Patatas
Adapted from here.
Prep Time-10mins | Cook Time-20mins | Serves-3people
Ingredients
2Potatoes thinly slices
1medium onion chopped
6Egg whites 
Few cilantro leaves chopped
2Tsp Black Pepper / chili powder for taste { Adjst as needed}
Salt for taste
2Tbs oil for potatoes & onion + 1Tbs oil for omelete 
Directions 
- Thin slice potatoes as shown in the picture. 
- Heat a non-stick pan with oil. To that add potatoes & onions. 
- Cook on medium heat for few minutes, then check if potatoes are cooked by pricking them with a tooth peck. 
- Once potatoes are cooked perfectly, switch off heat & keep aside. 
- Mean while break eggs in to a big bowl while separating yellow from whites.
- Add enough salt & pepper & whisk it lightly. 
- Add cooked onions & potatoes to the egg mixture along with coriander leaves. Mix in well. Adjust salt & pepper if needed.
- Heat a non-stick wide pan with oil & add the egg mixture to it. 
- Cook on low heat till a nice crust is formed. Now flip carefully & cook other side too.
- Do a tooth pick check & if it comes out clean switch off heat. 
- Transfer it to a plate. Cut in to pieces & serve. 
Note
- I made 2 mini omelette's with this recipe. 
Tortilla De Patatas
Follow me on "Facebook", "Google+", "Pinterest" for daily updates. Leave me a comment on any queries regarding this recipe & I will be able to answer it for you as soon as possible.


Thursday, September 18, 2014

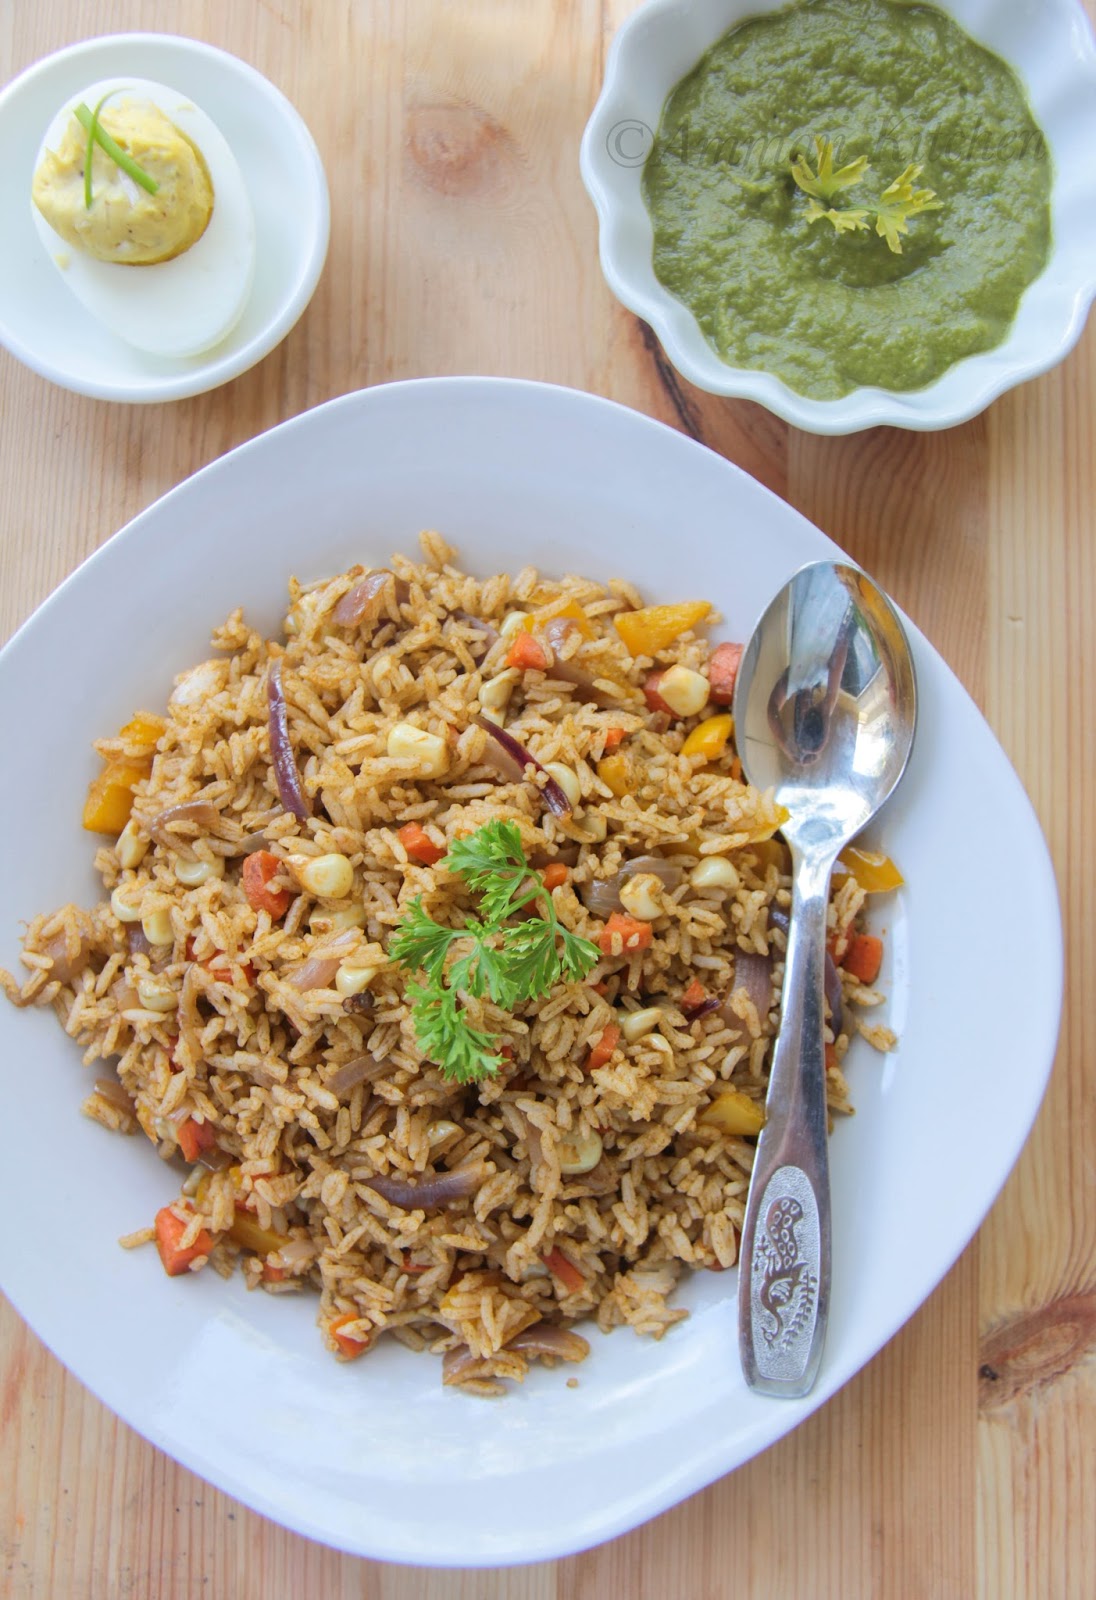
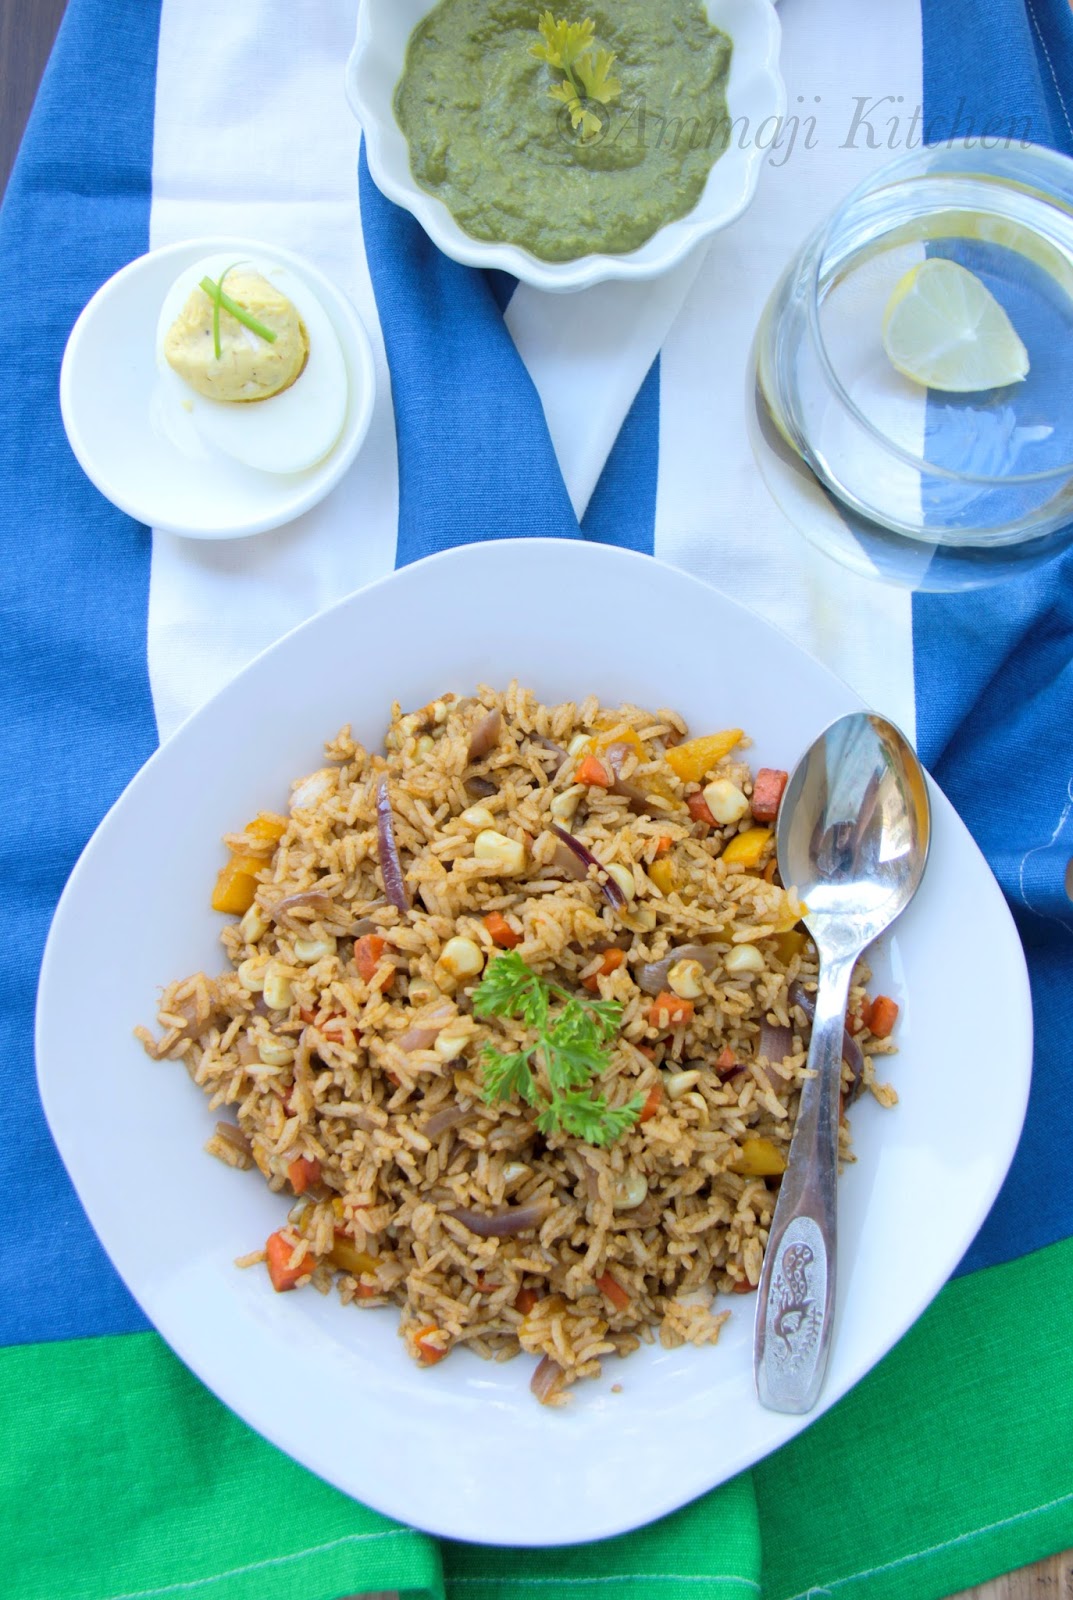
Arroz Con Verduras ~ Peruvian Cilantro Rice

Arroz Con Verduras
Arroz Con Verduras is a Peruvian rice dish with vegetables & cooked with cilantro paste . This dish is mildly flavored & served with a Peruvian Green Aji Sauce as a side.
Peruvian dishes are one of our {me & hubby} favorite foods.The near by Peruvian restaurant made us hooked to their food. Oh.. They have a live music on weekends & it's just awesome. My hubby is totally in to this Peruvian Green Aji Sauce & the fried rice they make. So I decided to make them at home for this marathon & we loved the outcome.
Cilantro green paste is heart of this dish. The recipe I followed, suggested adding few spinach leaves to control cilantro taste. I added few basil leaves to make it much tastier though it is not authentic to add them. 
Peruvian Green Aji Sauce is a special sauce made of lettuce, garlic & cilantro. The taste of this sauce is heavenly & very addictive. I made it as a side dish, but felt it needs some improvement & hence I skipped posting it here.
To know what my other friends are cooking, check out the Blogging Marathon page for the other Blogging Marathoners doing BM# 44
Arroz Con Verduras
Adapted from here.
Prep Time-15mins | Cook Time-25mins | Serves-2People
Ingredients 
1&1/2Cups short grained rice {uncooked}
2&1/2Cups water 
For the gravy 
2Cups cilantro
8Leaves spinach 
8Leaves basil 
5Green chili's 
1Big onion chopped 
3Garlic minced
1Yellow bell pepper
2Carrots finely chopped
1Cup fresh corn 
2Tbs tomato paste {optional}
2Habanero chili deseeded & chopped {Very spicy} {Optional}
3Tbs oil
Salt to taste
Directions
- Heat pan with oil, to that add onions & minced garlic. Cook on low heat till onions are translucent.
- Meanwhile grind cilantro, spinach, basil, tomato paste & green chili's to a smooth paste. If needed, add a little water to grind.
1.Stove Top Method
- Add in carrots, bell pepper, corn & chili to pan along with the grind paste. 
- Add in rice & enough water to cook rice. Add salt & cook it with a closed lid. Once the rice is done adjust salt if needed & switch off heat. 
2.Electric Cooker  
- In electric cooker add water, vegetables, rice & green paste we made along with salt. Mix well & cook according the cooker instructions. Once rice is cooked puff up & serve warm.
3.The Third Way
- Cook rice separately & cool it off. 
- Now to the onion pan  add in carrots, bell pepper, corn, salt & chili along with the grind paste. 
- Mix well & cook veggies with a closed lid.
- Once the veggies are cooked, switch off heat & allow it to cool. 
- Now mix in cooled off rice with the gravy & adjust salt if needed. 
- Allow it to sit for 30mins before serving. 
Note
- Exclude habanero chili's, basil leaves & tomato paste from the recipe for a authentic dish. 
Arroz Con Verduras
Follow me on "Facebook", "Google+", "Pinterest" for daily updates. Leave me a comment on any queries regarding this recipe & I will be able to answer it for you as soon as possible.

Friday, September 12, 2014

Korean Pan-Fried Tofu with Sauce | Dububuchim-Yangnyeomjang

Pan-Fried Tofu is a perfect snack or you can enjoy it as a side with fried rice. Sauce elevates the flavor of bland tofu to a super delicious level. We need a firm tofu for this dish, so that it can with stand the heat & won't crumble up while cooking. Serve with a little extra sauce in a bowl to dip tofu in & it will be much more satisfying.
To know what my other friends are cooking, check out the Blogging Marathon page for the other Blogging Marathoners doing BM# 44. 
Adapted from Maangchi.
Prep Time-5mins | Cook Time-10mins | Serves-2people
Ingredients 
1/2Block of firm tofu equally sliced  {1/2 of 19oz pack}
2Tbs oil
2Tsp sesame seeds
Sauce 
1Tbs soya sauce
1Garlic clove minced
2Scallions chopped
1Tsp honey 
1Tsp sesame oil 
2Tsp red chili powder
Pinch of salt
- In a bowl mix all the above sauce ingredients & keep aside.
Directions
- Heat a non-stick pan with oil. 
- Add the tofu slices to pan & cook them crisp on each side. They should be a little more than brown on each side.
- Now layer tofu on a plate & splash the sauce on tofu pieces by covering them evenly.
- Sprinkle sesame on tofu & enjoy the dish.
Follow me on "Facebook", "Google+", "Pinterest" for daily updates. Leave me a comment on any queries regarding this recipe & I will be able to answer it for you as soon as possible.


Thursday, September 11, 2014

Okonomiyaki | Japanese Pancakes

Okonomiyaki is Japanese pancake made of eggs & flour mixed with few veggies, noodles & topped with a special sauce to complete the recipe. The name okonomiyaki means "As you like it" or "What to like it" & sure you can literally add anything you like. I have seen few recipe which kept on adding & adding lot of layers to this pancake. 
Okonomiyaki pancakes are topped with a special sauce named as Okonomiyaki sauce. But to customize it I followed the recipe below I mentioned & customized it to our taste buds. me & hubby like spicy things, so I added some sriracha sauce to kick some heat {Though it wasn't enough for us :)}. Try these breakfast pancakes, sure you will love them.
Adapted from here.
Prep Time-10mins | Cook Time-15mins | Serves-4large pancakes 
Ingredients 
4Eggs 
1/4Cup wheat flour {replace with all-purpose flour}
1Cup shredded cabbage 
2Carrots grated 
2Scallions chopped 
1Tsp salt 
2Tbs oil 
Okonomiyaki Sauce {Not the traditional sauce}
1Tsp soy sauce
1Tbs tomato ketchup 
1Tbs mayonnaise 
1Tbs dijon mustard 
2Tbs sriracha sauce
1Tsp honey 
- Mix in all the above ingredients & keep aside. Adjust the flavors if needed.
Garnish 
Few scallions chopped 
Few sesame seeds
Directions
- In a bowl whisk eggs & wheat flour to a smooth paste.
- To that bowl mix in cabbage, carrot, scallions & salt.
- Heat a non-stick pan with little oil & pour in the batter in to a circle form.
- Cook it completely on one side, till it is slightly brown & liquid on top of pancake is vanished. Then flip it to the other side. 
- Cook for few seconds or till it goes to light brown in color.
- Remove it from pan & repeat the same with rest of the batter.
- Lay a pancake in a plate & top it with okonomiyaki  sauce along with scallions & sesame seeds. 
Note
- Batter is thick & easy to handle. 
- Traditional okonomiyaki sauce consists of worcestershire sauce & it's not vegetarian. So I made this my own version of sauce.
- You can add in your choice of vegetables apart from the one's I added. 
Follow me on "Facebook", "Google+", "Pinterest" for daily updates. Leave me a comment on any queries regarding this recipe & I will be able to answer it for you as soon as possible.


Wednesday, September 10, 2014

Irish Soda Bread Buns

Irish Soda Bread is a instant bread, made using baking soda & butter milk as raising agents. You don't use yeast & also don't have to wait for hours for the bread to raise again & again.
Buttermilk is one of the main ingredients in this bread & I replaced it with yogurt as I didn't have buttermilk readily available. They came out perfectly puffed up even when I have used yogurt. Maybe it's the active cultures that are same in both yogurt & buttermilk, which are working the same way. 
I made Irish soda bread buns instead of a whole bread for my serving convenience, you can make it as a whole bread & the recipe remains the same. You can add in few dry nuts, choco chips or any other of your choice by mix & matching them or as solo hero's in this recipes.
To know what my other friends are cooking, check out the Blogging Marathon page for the other Blogging Marathoners doing BM# 44. 
Adapted from here.
Prep Time-10mins | Bake Time-30mins | Serves-8buns
Ingredients 
2Cups all purpose flour + 3Tbs flour for dusting
1Tsp baking powder
1Tsp baking soda 
1/2Tsp salt
3Tbs brown sugar 
1/2Cup raisins 
1/2Cup solid butter 
1Egg 
3/4Cup butter milk
Directions 
- Pre-heat oven @350degrees & brush a muffin pan with butter.
- In a big bowl sift flour, baking powder & soda. To that add salt & brown sugar.
- Chop butter in to small pieces & add it to the flour bowl. 
- In another small bowl whisk egg & buttermilk. 
- Add the egg mixture to flour bowl & mix it well. Fold raisins in to the dough. 
- Dust the plain surface with flour & place the dough & form a ball of dough.
- Divide dough into 8 equal size buns or as many you like. 
- Arrange the buns in muffin pan & brush them with little melted butter on top. 
- Bake them @350degrees for 30mins or as needed.
- Once you see the brown crust & after a tooth pick comes out clean, remove the pan from oven. 
- Allow them to cool & serve them with butter or your choice of jam. 
Note
- Don't use melted butter in this recipe. Using melted butter increases the wetness in the recipe & that turns the dough too sticky.
- You can bake this dough as one big bread if you want. For that layer a pan with parchment paper & place the round shaped dough on it. Make a slit in a cross shape on top of the bread & bake it as mentioned above. 
- Baking time changes from oven to oven. Adjust the time as needed.
Follow me on "Facebook", "Google+", "Pinterest" for daily updates. Leave me a comment on any queries regarding this recipe & I will be able to answer it for you as soon as possible.

Monday, September 8, 2014

Bora Curry | Guyanese Long Bean Curry


Bora curry / Long beans curry is a traditional Guyanese curry. The making of this curry is very close to Indian style of cooking. The spices used in this are very much available is any Indian household. This is a easy to make dish. This curry is perfectly spicy & very tempting.To know what my other friends are cooking, check out the Blogging Marathon page for the other Blogging Marathoners doing BM# 44. 


Adapted from here.
Prep Time-10mins | Cook Time-20mins | Serves-3people
Ingredients 
2Cups long beans 
1Medium onion chopped
1Potato chopped to bite size pieces
1Medium tomato chopped
2Garlic cloves sliced
1Tsp red chili powder / Paparika {adjust as needed}
1Tsp garam masala 
1/4Tsp turmeric
1Tsp coriander powder
2Tbs water
Salt to taste
2Tbs coconut oil or oil of your choice
Directions 
- Heat pan with oil. To that add garlic & onions, fry them till onions are translucent. 
- Meanwhile in a bowl take chili powder, garam masala powder, coriander powder, salt, turmeric & water.
Mix them to a smooth paste. 
- Once onions are translucent add tomatoes, potato & long beans to pan.
- Give a nice stir & add the masala paste to pan. Stir once more & close with lid. 
- Cook with a lid on until potatoes are done well. 
- Adjust salt & chili powder if needed & switch off heat. 
- Serve warm with rice or roti. 
Note
- You can 1/2Cup coconut milk to the curry, while adding veggies to the pan. 
- You can also garnish with coriander at the end for an added flavor.
Follow me on "Facebook", "Google+", "Pinterest" for daily updates. Leave me a comment on any queries regarding this recipe & I will be able to answer it for you as soon as possible.


Saturday, September 6, 2014

Friands | French Mini Cake

Friands are mini French cakes. They are small & tempting little cakes, which just melts in your mouth. The basic recipe requires almond flour but when I saw the recipe with pecan & coconut flour, I decided giving it a try as I love coconut & my hubby likes pecans. 
Friands are generally backed in a Friand pan, which are sold in the market, but I went a head using a mini cake pan in making this cakes. Topping them with raspberries added a tangy bite to the cake.
To know what my other friends are cooking, check out the Blogging Marathon page for the other Blogging Marathoners doing BM# 44. 
Adapted from here.
Prep Time-20mins | Cook Time-20mins | Yields-9Friands
Ingredients
65g or 2/3Cup pecans
20g or 1/2Cup desiccated dry coconut
4Egg whites
1Cup icing sugar
1/2Cup flour
120g / 1/2Cup butter @room temperature
1/2Cup frozen raspberries
1Tbs icing sugar for dusting
2Tbs flour for dusting
1Tbs butter for brushing the pan
Directions 
- Pre heat oven @350degree. Butter the muffin pan or a mini cake pan or Friand pan if you have. Dust it with flour & keep aside.
- Grind pecans & coconut to a smooth flour. 
- In another bowl light whisk eggs & keep aside.
- In a large bowl mix pecan & coconut flour, egg white, butter, sugar & flour. 
- Mix them well till they are blended well. 
- Scoop up the batter & fill in the pan wholes to the top.
- Now top the batter with raspberries. 
- Bake @350degrees for 15mins to 20mins or until the tooth picks comes out clean.
- Once they are done, remove them from oven & cool them down on a counter top.
- Dust Friands with icing sugar & serve them warm. 
Note
- You can replace pecan & coconut flour with almond flour. 
- Raspberries can be replaced by blueberries, strawberries or any other fruit you like. 
Follow me on "Facebook", "Google+", "Pinterest" for daily updates. Leave me a comment on any queries regarding this recipe & I will be able to answer it for you as soon as possible.