Showing posts with label Blogging Marathon. Show all posts

Friday, February 13, 2015

Chocolate Cake | Eggless Mini Cake

Chocolate Cake, the most delicious cake has been around for many decades was originated in America. Cake's are delectable & when it's a chocolate cake you can never stop with one bite. Cake's are perfect to serve for any occasion. They come in different sizes, I mean you can manage the portions & can control the unnecessary munching of it. I love to enjoy a small portion of it & I decided on making a small cake for my sweet cravings. You can bake or microwave this cake. I prefer to microwave rather than oven for the convince & with microwave you can enjoy the cake in no time. 
For this week theme on BM I'm presenting " Dessert Recipes". Enjoy the dishes & don't miss the update. Check out the Blogging Marathon page for the other Blogging Marathoners doing BM#49.
Prep Time-10mins 
Cook Time-2mins
Serves-2 people 
Ingredients 
4Tbs all-purpose flour
6Tbs brown sugar 
4Tsp cocoa powder 
1/4Tsp baking soda 
1/4Tsp baking powder 
Pinch of salt 
4Tbs butter @ room temperature
6Tbs milk {add it as needed}
4Chocolate pieces to layer
Powdered sugar & strawberries for garnish
Directions
- In a bowl sift flour, sugar, cocoa powder, baking soda, baking powder & salt. Mix them well. 
- Add in butter. Next add in little by little of milk to form a smooth batter. Mix it well. 
- Grease a bowl with butter. Layer the chocolate pieces. 
- Pour in batter & microwave it for 2mins. 
- Allow it to cool off before transferring to a plate. Loose the ends of cake using a spoon & flip it on to a plate. 
- Garnish with powdered sugar & strawberries or as you wish. 
Note
- Cooking time varies with microwave.  
- If using white sugar, add in 5Tbs & add more if it needs.
Follow me on "Facebook", "Google+", "Pinterest", "Instagram" for daily updates. Leave me a comment on any queries regarding this recipe & I will be able to answer it for you as soon as possible.

Tuesday, February 10, 2015

Semolina Pudding with Strawberry Sauce

Valentine's Day is around the corner & air is already filled with lots of love. On time I got some strawberries to make the valentine's day tastier & colorful.
Semolina pudding is a traditional german dish. I added a little vanilla flavoring to the pudding to make it much more tastier. How I know that vanilla makes it more tastier ? I made it twice before posting it in this blog & the first experiment with out vanilla made it a little bland. The base dish "Semolina pudding" remains the same, but you can customize the sauce with your choice of fruit to make it more interesting.
Adapted from : Semolina Pudding
Prep Time-5mins
Cook Time-20mins { For both sauce & semolina} 
Serves-2people 
Ingredients 
2Cups milk 
1/4Cup sugar
3Tbs butter 
1Tsp vanilla extract
1/2Cup semolina/sooji 
Few chopped strawberries & almonds
For Sauce 
1Cup chopped strawberries
2Tbs brown sugar
1/2Tsp lemon juice 
1/4Cup water
Directions
- In a deep pan mix milk, vanilla extract, butter & sugar. Bring them to boil on low heat. Then add in semolina little by little while stirring it. Allow the mixture to become thick. Switch off heat & keep aside.
Sauce
- Heat a pan with strawberries, water, lemon juice & sugar. Bring to boil & cook till strawberries are soft. Switch off heat & allow it to cool. 
- Grind it & stain the sauce.
-  Divide semolina in to 2 bowls & add in spoons full of sauce to it. Garnish with chopped strawberries & almonds or as you like.
Note
- Adjust the sugar as per your taste. 
- Semolina pudding might not be thick as soon as you cooked, eventually it gets smooth & easy to dig in.
- Left out semolina pudding can be refrigerated. When you want to have it, microwave it with enough milk & enjoy the pudding.
Follow me on "Facebook", "Google+", "Pinterest", "Instagram" for daily updates. Leave me a comment on any queries regarding this recipe & I will be able to answer it for you as soon as possible.


Thursday, February 5, 2015

Cabbage Potato Curry

Cabbage is a very versatile vegetable. Though it might taste very bland, when mixed it with other veggies & spices it tastes much more delectable & yummy. Cabbage potato curry is a easy to make dish with less ingredients & can also be made in less time. As mentioned in the note you can simply ignore adding garlic & replace it with hing/asafetida. 
For this week theme on BM I'm presenting "One Ingredient & 3 dishes". Enjoy the dishes & don't miss the update. Check out the Blogging Marathon page for the other Blogging Marathoners doing BM#49.
Prep Time-10mins 
Cook Time-30mins 
Serves-2people
Ingredients 
3Cups chopped cabbage 
1Big potato {skin peeled & chopped to big pieces}
1Big tomato chopped 
1Tsp chili powder 
Salt to taste 
Few coriander leaves to garnish 
Tempering 
1Tsp mustard 
1Tsp jeera 
1Tsp chana dal 
1Tsp urad dal
3Red chili's cut equally 
2Garlic cloves minced or chopped finely 
Directions 
- Take a deep vessel half way thru filled with water. Add in cubed potatoes with pinch of salt. Cook potatoes till they are done done perfectly. Switch off heat & strain  the excess water. Keep them aside.
- Heat pan with oil. To that add the add chana dal & urad dal. Once they turn to light in color add in mustard, jeera & red chili's.
- Once the mustard starts jumping add in minced garlic to pan. Fry for few seconds or till the raw smell goes off. 
- Than add in tomatoes & cabbage. Cook them with a closed lid for 5mins. Tomatoes will go soft & cabbage is cooked perfectly. If not cook for few more minutes with a closed lid. 
- Add in cooked potatoes salt & red chili powder. Mix them well. Cook on low to medium heat till the curry comes together. It takes no more than 3mins for the curry to come together. Adjust salt & spiciness if needed. 
- Switch off heat & garnish with chopped coriander. 
- Curry is ready to serve.
Note
- If you are pressure cooking cabbage, then add in potatoes to that. You don't have to boil them separately.
- You can skip adding garlic to the curry. Instead you can use hing/Asafetida while tempering the curry. 
Follow me on "Facebook", "Google+", "Pinterest", "Instagram" for daily updates. Leave me a comment on any queries regarding this recipe & I will be able to answer it for you as soon as possible.

Wednesday, February 4, 2015

Cabbage Moong Dal Curry

Cabbage Moong Dal Curry is another tasty way of using cabbage. I love the mix of  cabbage & moong dal when they are tempered with hing. Hing/Asafetida gives a very unique taste to the curry & makes it much more flavorful. I wouldn't like to skip adding hing or replacing it with something else, as it pairs perfectly with the curry. As you can see this is a easy to make dish & can be made in no time too. Enjoy this dish !!!
For this week theme on BM I'm presenting "One Ingredient & 3 dishes". Enjoy the dishes & don't miss the update. Check out the Blogging Marathon page for the other Blogging Marathoners doing BM#49.
Prep Time-1hr 10mins { 1hr is for soaking dal}
Cook Time-30mins 
Serves-2People 
Ingredients 
3Cups chopped cabbage 
1/4Cup moong dal {Soak for 1hr}
1Tsp mustard seeds 
1Tsp jeera/cumin 
1Tsp chana dal 
1Tsp urad dal 
3Red chili's broken in to half
1/2Tsp hing 
Few curry leaves 
Salt to taste 
1Tbs oil
Directions 
- Wash & soak moong dal for minimum of 1hr. 
- To start with heat pan with oil. Add in chana dal & urad dal to pan. Fry them to light brown in color. Add in mustard, jeera, red chili's, curry leaves & hing to pan. 
- Once the mustard starts jumping add in moong dal with 1/2cup water & close it with a lid. 
- Cook on medium heat for 5mins or until you see moong dal is cooked perfectly.
Method 1: 
- Add cabbage to pan & close with lid. On low heat cook for 5mins to 10mins. 
- Once the cabbage is cooked add in enough salt & mix it well. Cook for 2mins more & switch off heat. 
Method 2: 
- Pressure cook cabbage. Add it to the cooked moong dal along with enough salt. 
- Mix in & cook for 5mins on medium heat while stirring once in a while. Make sure there is no liquid left in the curry. It should be dry & not clumpy. 
- Switch off heat & allow curry to cool before serving. 
Note 
- Moong dal shouldn't be over cooked. To cook moong dal add no more than 1/2cup water. 
- If you need this curry to be a little more spicy, then add in 2 sliced green chili's while tempering. 
- Don't skip adding hing in this curry.
Follow me on "Facebook", "Google+", "Pinterest", "Instagram" for daily updates. Leave me a comment on any queries regarding this recipe & I will be able to answer it for you as soon as possible.

Tuesday, February 3, 2015

Cabbage Curry

Cabbage curry with less spices is always comforting & soothing to your stomach. Cabbage is one of those veggies you don't have to add too many spices to make it flavorful. With little effort you can make yummy dishes out of this veggie. As a kid I hated this veggie a lot & all that hatred changed when I started experimenting on cabbage. This is a simple, yet basic recipe I'm sharing here & can be made in very less time too. 
For this week theme on BM I'm presenting "One Ingredient & 3 dishes". Enjoy the dishes & don't miss the update. Check out the Blogging Marathon page for the other Blogging Marathoners doing BM#49.
Prep Time-5mins 
Cook Time-20mins or less
Serves-2people 
Ingredients
4Cups chopped cabbage
4Tsp oil
1Tsp mustard
1Tsp jeera/cumin
1Tsp chana dal
1Tsp urad dal
2Red chili's broken in to half
Few curry leaves
To Grind
4Tbs grated coconut (fresh or dry)
2Green chili's {adjust as needed} 
1Tsp grated ginger
Directions 
- Heat pan with oil & to that add in mustard, jeera, chana dal, urad dal, red chili's & curry leaves.
Method 1:
- Once the mustard starts jumping add in chopped cabbage & close pan with lid. 
- Cook on low heat for 10mins & once you see the cabbage is oozing out little wetness, remove lid & continue to cook on low heat for another 5mins. 
- Mean while coarse grind ginger, green chili's & coconut. 
- Add salt to the curry & also the grind coconut mixture to pan. Mix them well & cook for 2minutes. Then switch off heat. 
Method 2:
- If cabbage is not tender, then you can pressure cook cabbage ahead. 
- Add it to the tempering & cook for few minutes. 
- Then add in the grind coconut mixture & salt  to the curry. Cook for 2more minutes & switch off heat. 
- Curry is ready to be served.
Note
- I prefer pan cooking cabbage than pressure cooking it. I feel cabbage becomes watery & tastes different when you pressure cook it. 
- Adjust green chili's as needed. I used thai chili & 2 were more than enough to this curry. 
Follow me on "Facebook", "Google+", "Pinterest", "Instagram" for daily updates. Leave me a comment on any queries regarding this recipe & I will be able to answer it for you as soon as possible.

Monday, December 22, 2014

Kumbala Curry | Coorg Pumpkin Curry

For this week theme on BM I'm showcasing "Karnataka Dishes". Today I'm sharing a recipe from "Coorg". Enjoy the dishes & don't miss the updates. Check out the Blogging Marathon page for the other Blogging Marathoners doing BM# 47.
Pumpkin curry / Kumbala curry is a delicious side dish from Coorg. The season was so perfect as markets are filled with different varieties of pumpkins. They tempted me & bought few home to experiment this curry. This curry is sweet, tangy & spicy at the same time with a finger licking taste. 
Even though the author suggested it is best to pair with akki roti, we enjoyed this curry with rice for lunch & it was just yum. I used two different variety pumpkins & hence you can see the slight color difference in the curry. Finally I can say that you will love this curry & sure will be in your to make recipe list.
Adapted from here & here.
Prep Time -10mins
Cook Time-20mins
Serves-2people
Pairs with rice, akki roti{as mentioned by original author} & chapati.
Ingredients
2Cups bite size chopped pumpkin pieces
1/2Tsp turmeric
2Tsp tamarind pulp
1Tsp jaggery
1Cup water
For Seasoning 
3Tsp oil
1Tsp mustard seeds
2Red chili's
Few curry leaves
Salt to taste
To Grind 
1/2Cup grated coconut
1Tsp coriander seeds
1Tsp jeera/cumin
4Red chili's
Directions
- Dry roast coriander, jeera & red chili's to light brown in color. Allow it to cool & grind them along with coconut to smooth powder.
- Heat pan with oil. Add mustard seeds, curry leaves & red chili's. Once the mustard starts jumping add in pumpkin pieces & turmeric to pan. Close with a lid & cook for 10mins till the pumpkin pieces are cooked.
- Add in tamarind pulp, salt & jaggery. Mix them well.
- Add in the coconut mixture along with water to it. Cook on low heat till the water evaporates & mean while adjust the taste if needed.
- Pumpkin curry is ready to serve.
Note 
- You can omit adding tamarind & jaggery to the curry. But adding them will definitely enhance the flavor.
- Add in 2minced garlic cloves while seasoning the curry. I omitted it to make no onion no garlic dish.
Follow me on "Facebook", "Google+", "Pinterest", "Instagram" for daily updates. Leave me a comment on any queries regarding this recipe & I will be able to answer it for you as soon as possible.

Friday, December 19, 2014

Carrot Cabbage Palya {Udupi Brahmin Style Curry}

For this week theme on BM I'm showcasing "Karnataka Dishes". Today I'm sharing a recipe from "Udupi Cuisine". Enjoy the dishes & don't miss the updates. Check out the Blogging Marathon page for the other Blogging Marathoners doing BM# 47.
Palya is a Karnataka style side dish. This curry is easy to make & taste delicious with the blend of ingredients we use in making them. 
I'm sharing Udupi brahmin style palya here. It's little different from the other palya's I make, but the taste was tempting & we loved it. I love to mix & match veggies when making palya's, but you can just go with single veggie at a time. Green beans, cabbage, carrots, cluster beans, Ivy gourds are my favorite veggies & love to make comforting palya with them. 
Enjoy this comforting no onion no garlic dish.
Adapted from here.
Prep Time-10mins 
Cook Time-30mins
Serves-2People
Pairs with rice & chapati.
Ingredients 
2Cups chopped cabbage 
1Cup chopped carrots 
2Tbs oil 
1Tsp mustard 
1Tsp jeera/cumin 
2Red chili's broken in to half 
1/2Tsp hing 
Few curry leaves 
Salt to taste 
To grind 
3Tbs grated coconut
2Red chili's 
1/2Tsp mustard seeds
1/2Tsp turmeric 
2Tbs tamarind pulp 
Directions 
- Heat pan with oil. Add mustard, jeera & red chili's to it. Once the mustard starts jumping add hing & curry leaves. 
- Next add in cabbage & carrot to pan along with salt. Close pan with lid & cook for 10mins on low heat. Check carrots if it's cooked well. If not cook veggie's with a closed lid for 5mins more. 
- Mean while grind grind the ingredients under grind coarsely. Once the veggies are cooked well add in the grind mixture to pan. 
- Mix them & adjust taste if needed. Cook on low heat for 5mins & switch off heat. 
- Palya is ready to serve. 
Follow me on "Facebook", "Google+", "Pinterest", "Instagram" for daily updates. Leave me a comment on any queries regarding this recipe & I will be able to answer it for you as soon as possible.

Thursday, December 18, 2014

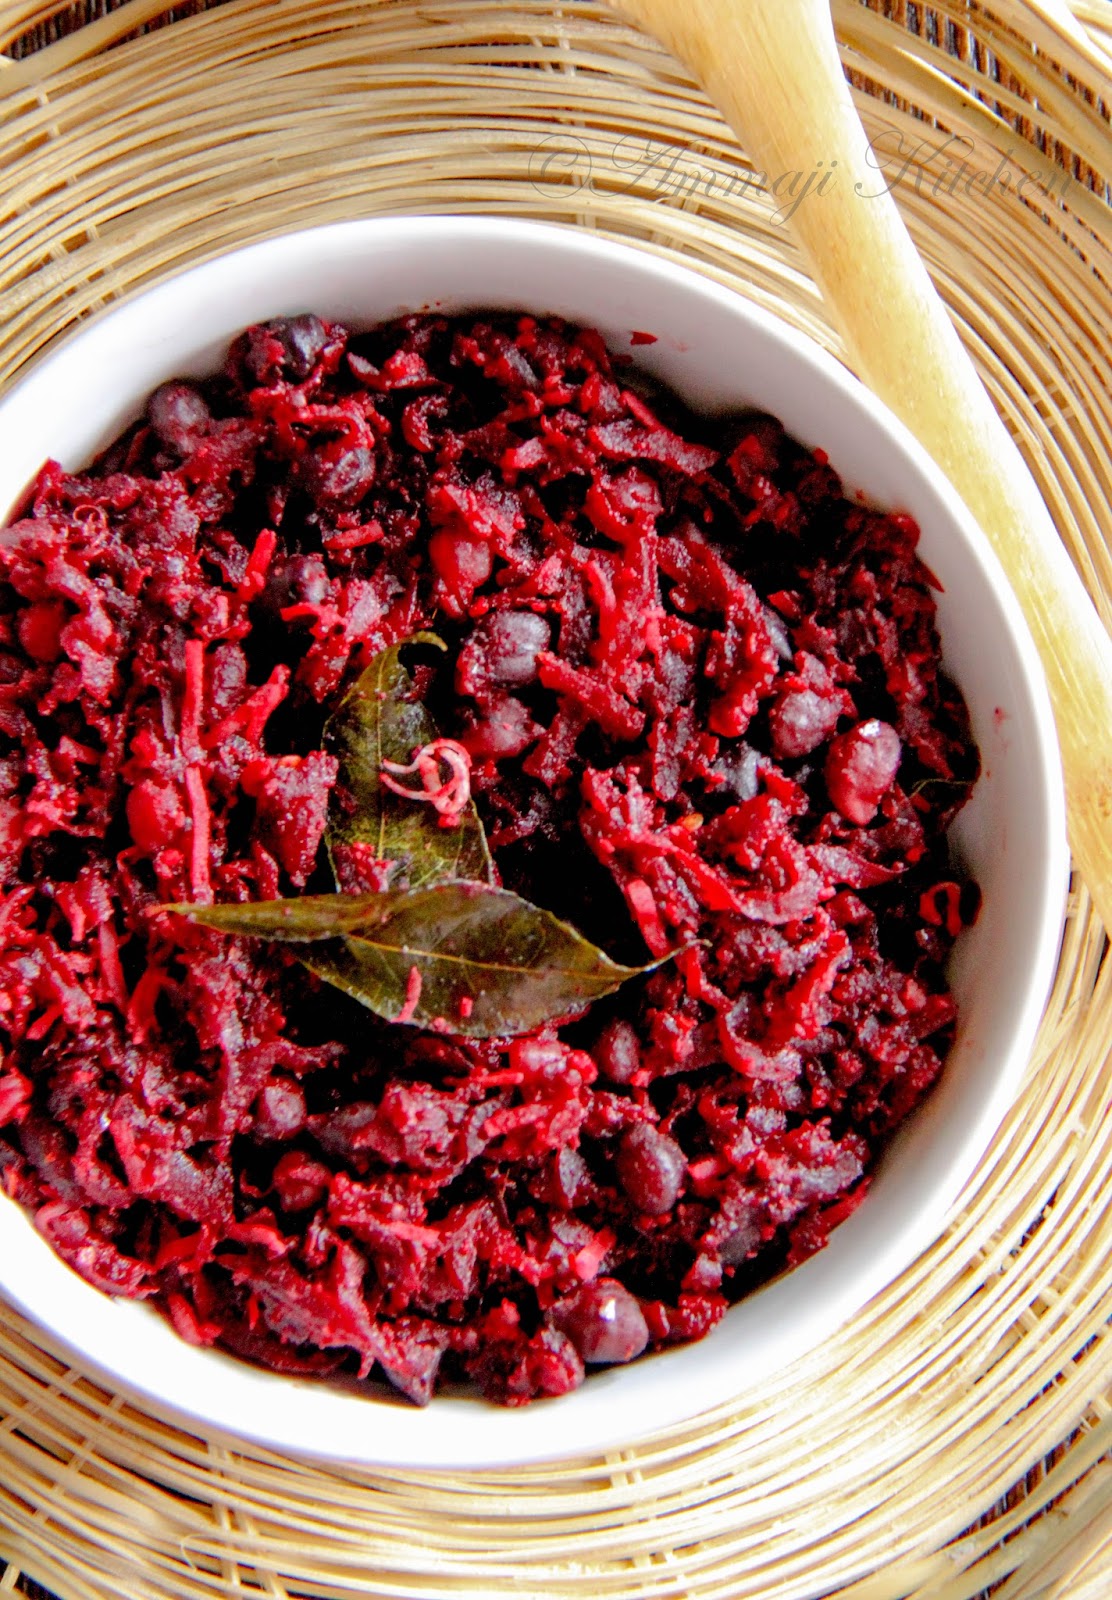
Beetroot Sukka

Beetroot Sukka
Sukka is a Mangalorean side dish. This dish is a blend of dal, spices & coconut mixture. In my research for a Mangalorean dish I discovered that Sukka is mainly a non-vegetarian dish & has different versions too. 
The version I tried is very similar to the curry I use to have in Bangalore restaurants. At that time for me any curry that is sprinkled generously with coconut was a palya & nothing else. Eventually when food blogging became part of my life I was enlightened with all the different versions of them. I came across two versions of this recipe & tried to re create the dish with my sweet memories from Bangalore. 
I like to grate carrots & beetroots as they cook fast rather than when they are chopped. I'm against to boiling vegetables as they loose the nutritional values so went a head with grated beetroots as they cook fast, but you can use chopped pieces to make this curry. This curry is comforting & delicious. You would love to make it many more times for sure. Enjoy!!!

Beetroot Sukka
Adapted from here & here.
Prep Time-8hrs + 10mins {soaking dal+prepping}
Cook Time-20mins
Serves-2People
Pair this curry with rice & chapati. 
Ingredients 
2Cups grated or chopped beetroot
2Tbs black channa dal/kala chana {soaked overnight}
1Tsp tamarind pulp
1Tsp jaggery
Salt to taste
For seasoning/Tadka/Popu
3Tsp oil
1Tsp mustard
Few curry leaves
2Red chili's broken in to half
To grind 
1/2Cup {fresh or dried}
1Tsp coriander seeds
3Garlic cloves
2Tsp jeera
4Red chili's
Directions
- As mentioned above soak chana overnight.
- Heat pan with oil. To that add mustard, red chili's & curry leaves. Once the mustard starts jumping add in soaked chana to pan. Cook with a close lid for 5mins.
- Add in beetroot & enough salt. Cook with a closed lid for 10mins.
- Meanwhile dry roast coriander seeds, jeera & red chili's to brown in color. Cool them before grinding.
- Grind garlic & roasted ingredients to smooth powder. Next add in coconut & grind coarsely.
- By now beetroot would be cooked perfectly. Mix tamarind & jaggery to curry.
- Next add in grind mixture to pan & mix them well. Cook on low heat for 5 mins. Switch off heat.
- Sukka is ready to serve.
Beetroot Sukka
Follow me on "Facebook", "Google+", "Pinterest", "Instagram" for daily updates. Leave me a comment on any queries regarding this recipe & I will be able to answer it for you as soon as possible.

Sunday, December 7, 2014

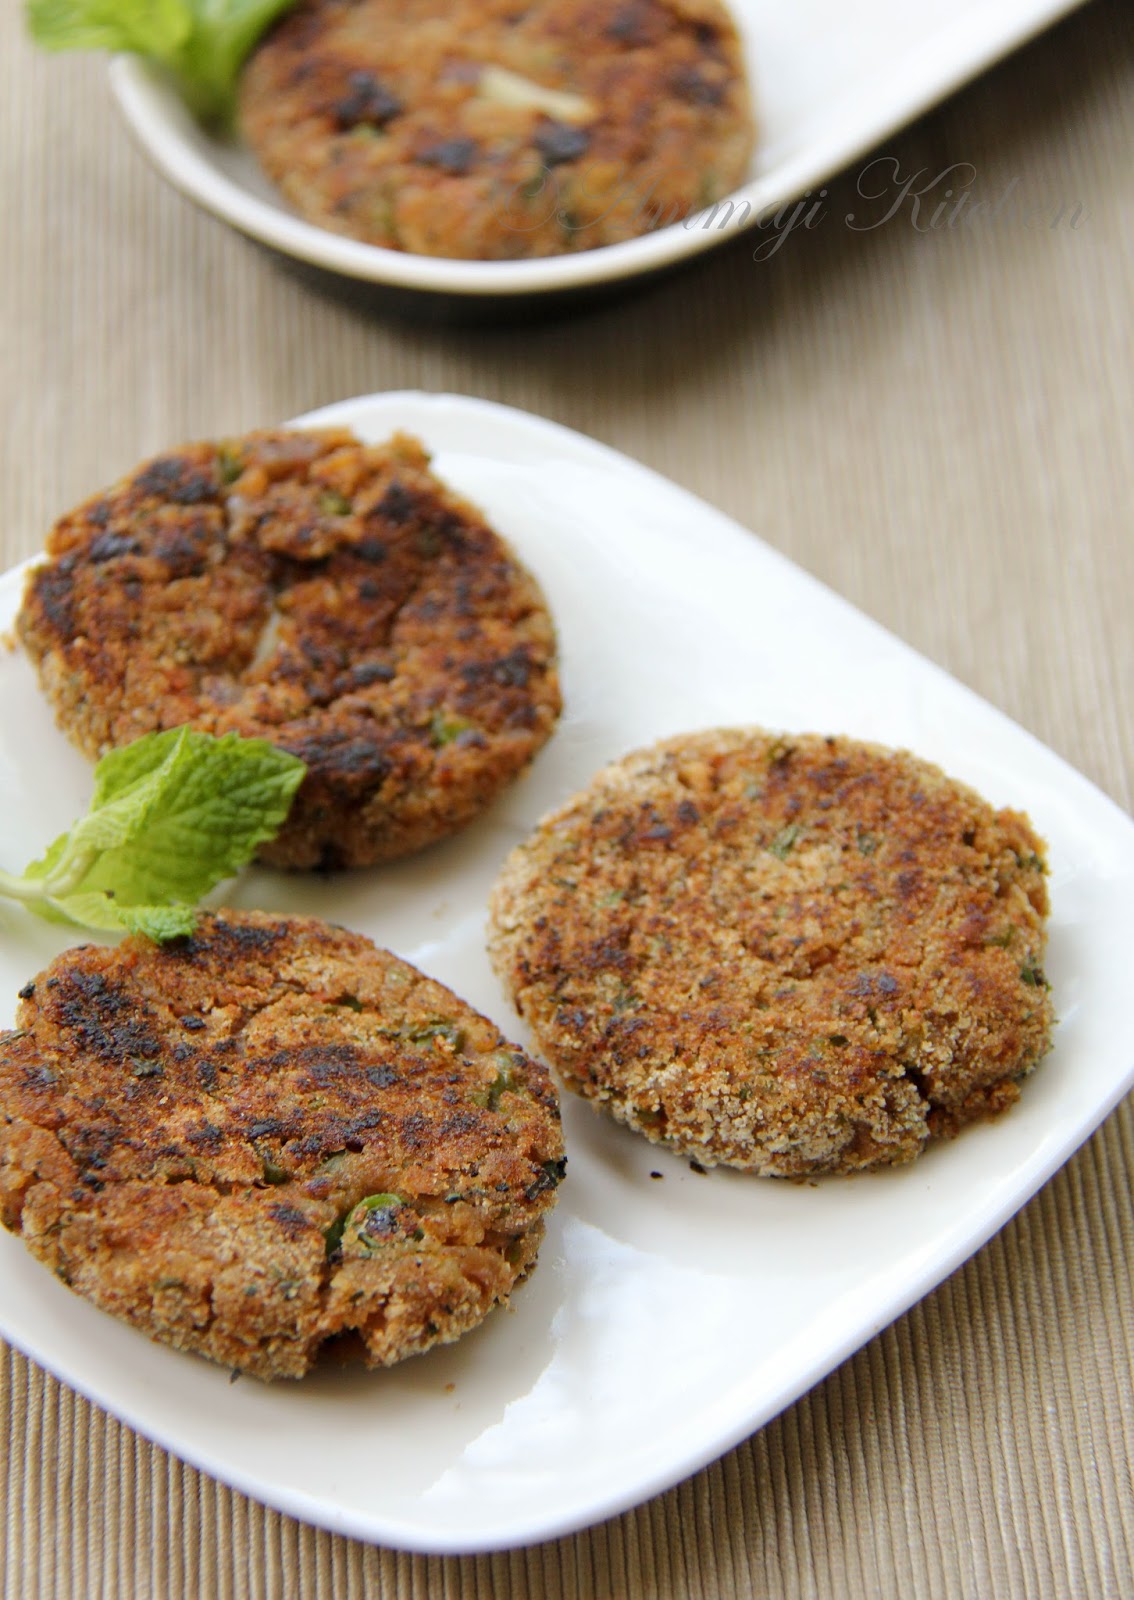
Green Peas Cutlets

Green Peas Cutlets

Green Peas Cutlets are a easy to make snack or appetizer. They can be served as a party starter or can be enjoyed as a teatime snack too. Cutlets can be deep-fried or can be pan-fried, so in this recipe I pan-fried them to keep them light on tummy with no compromise in taste. So here I'm sharing a simple recipe for yummy cutlets, which will make your taste buds happy. 
For this week theme on BM we are showcasing "North Indian Party Starters". I'm starting this marathon with "Paneer Tikka" recipe. Enjoy the dishes & don't miss the update. Check out the Blogging Marathon page for the other Blogging Marathoners doing BM# 47.
Green Peas Cutlets

Prep Time-30mins
Cook Time-15mins
Serves-10Cutlets, 5People
Ingredients 
2Small potatoes 
1Big carrot finely chopped 
1/2Cup green peas
1Onion Finely chopped 
3Garlic cloves minced 
15Mint leaves chopped 
1/4Cup breadcrumbs + 1/4Cup breadcrumbs to coat the patties
1Tsp chili powder {adjust as needed}
2Tsp garam masala 
2Tsp amchur powder 
Salt to taste 
1Tbs oil
Oil for frying cutlets {pan frying}
Directions 
- Steam boil potatoes. Peel the skin off & keep them aside.
- Heat a pan with 1tbs oil. To that add onions & garlic mince. Cook them till onions are little soft. 
- Add in carrots & green peas to pan. Stir them with onions & cook them on low heat with a closed lid for 10mins. If carrots are cooked perfectly then switch off heat or cook for few more until carrots are cooked. Switch off heat & allow them to cool.
- In a bowl add potatoes, veggie mix & mint leaves. Smash them to a smooth paste with no lumps. 
- Add in 1/4cup breadcrumbs, chili powder, garam masala, amchur powder & enough salt. Mix them well & balance the salt & chili powder if needed. Divide the mix in to 10 equal balls. 
- Take 1/4cup of breadcrumbs in a bowl. Now take a ball of mix & press it to get a circle shape. Coat it with the breadcrumbs on both sides. Repeat the same with rest of the balls.
- Mean while heat pan with little oil. Place the patties in frying pan as many as it fits & cook them on each side till they are little crisp. 
- Remove them on to a plate & repeat with rest of them. 
- Enjoy this cutlets along with ketchup, green chutney, sweet mango chutney or any of your choice one's. 
Note
- Add in a 1Tsp of cumin coriander powder for much added flavor. 
- I used extra hot chili powder, so adjust the chili powder as needed.
- I added the breadcrumbs to make stiff patties. 
Green Peas Cutlets
Follow me on "Facebook", "Google+", "Pinterest", "Instagram" for daily updates. Leave me a comment on any queries regarding this recipe & I will be able to answer it for you as soon as possible.