Friday, December 11, 2015

{Product Review} Procizion - Digital Kitchen Scale PRO8006

Have you ever used a digital kitchen scale? If not, it's time you should get one. Today I'm sharing a review on Procizion-Digital Kitchen Scale PRO8006and it is really worthy for it's price.


Procizion-Digital Kitchen Scale PRO8006
I got this product in mail few weeks back. As you see this product comes with measuring spoons, a micro fibre cloth & 2 set of batteries. This product is sleek, beautiful & takes very less space in your kitchen. Cleaning is very easy & food will not stuck anywhere as it is a plain glass. The micro fibre cloth that comes with this product comes in very handy while cleaning it.

This advanced digital scale with touch sensitive buttons is simple to use & easy to maintain. This scale comes with a black reflective tempered glass, which is more stronger than any other glass. The button on/off helps in operating the scale easily.

This scale convert weights to Kilograms, grams, pounds & to ounces by just pressing the "Unit" button as you have seen in the picture. This digital scale is equipped with 4 new, high-precision GFX sensors & can weight accurately from 0.1oz to 11lbs/5kgs of weight. 

How to use???
As I said earlier using this scale is very simple. If you want to weight in particular food item & if you can't weight it directly on the scale you can use a bowl as shown above & weight it first. This scale gives you a tare option. As you see once you press tare the weight of bowl goes to zero. Then you can add the particular food for an exact weight of it.{I was weighing almonds in grams.}

You can use this scale for any kind of cooking measurements & also for dietary needs. I'm watching my diet for past few months & this scale is helping me very well in managing my diet.

Procizion-Digital Kitchen Scale PRO8006is a top notch scale that is available in the market, so grab while they are available.

Disclaimer: I got the above pictured scale for a product review & no monetary benefit. My thoughts & opinions are no way influenced. I'm totally satisfied by this product & the review was not manipulated in anyway.

Monday, June 29, 2015

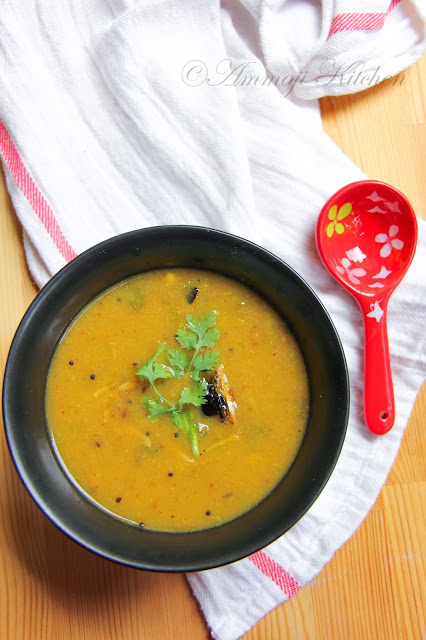
Mango Rasam Recipe | Mamidikaaya Rasam | | How to make Mango Rasam

Yum
Mangoes are loved by all &  are everyone's favorite. Enjoying mangoes is no more limited to summer these days. They are available in market for year long and are giving a chance to enjoy them when ever you like. Here is a dish which makes mangoes much more delicious & yummy to taste. 
Mango Rasam or Mamidi Pandu Rasam is a flavorful dish which can be made summer long or as long as mangoes are available in the market. This is simple yet delicious dish which can be made with less ingredients. Enjoy this dish !!!
Prep Time-5mins
Cook Time-20mins
Serves-3people
Ingredients
1Cup mango fruit pulp
1&1/2Cup water
1Tbs Rasam Powder
2Tsp tamarind pulp {Optional}
1Tsp sugar {Optional}
1Tsp chili powder
Salt as needed
Few coriander leaves for garnish
Tempering/ Popu/ Tadka
1Tsp mustard
1Tsp jeera
2Red chili's broken into half
1Garlic minced or chopped
1Tbs oil
Directions 
- Grind pulp to a smooth paste. In a vessel take mango pulp & water as needed.
- Next add in rasam powder, chili powder, sugar & salt. Mix them well & balance taste if needed.
- Cook rasam on low heat for 15mins & switch off heat.
- Heat pan with oil. To that add mustard, jeera, red chili's & garlic. Once the mustard starts jumping switch off heat & mix it with rasam.
- Top rasam with coriander leaves as you like.
- Serve warm with rice.
Note
- I skipped adding tamarind as the mango pulp was sour enough for the dish. Use tamarind as needed.
- Sugar is also optional & use it as needed after tasting.
Follow me on "Facebook", "Google+", "Pinterest", "Twitter", "Instagram" for daily updates. Leave me a comment on any queries regarding this recipe & I will be able to answer it for you as soon as possible.

Thursday, May 21, 2015

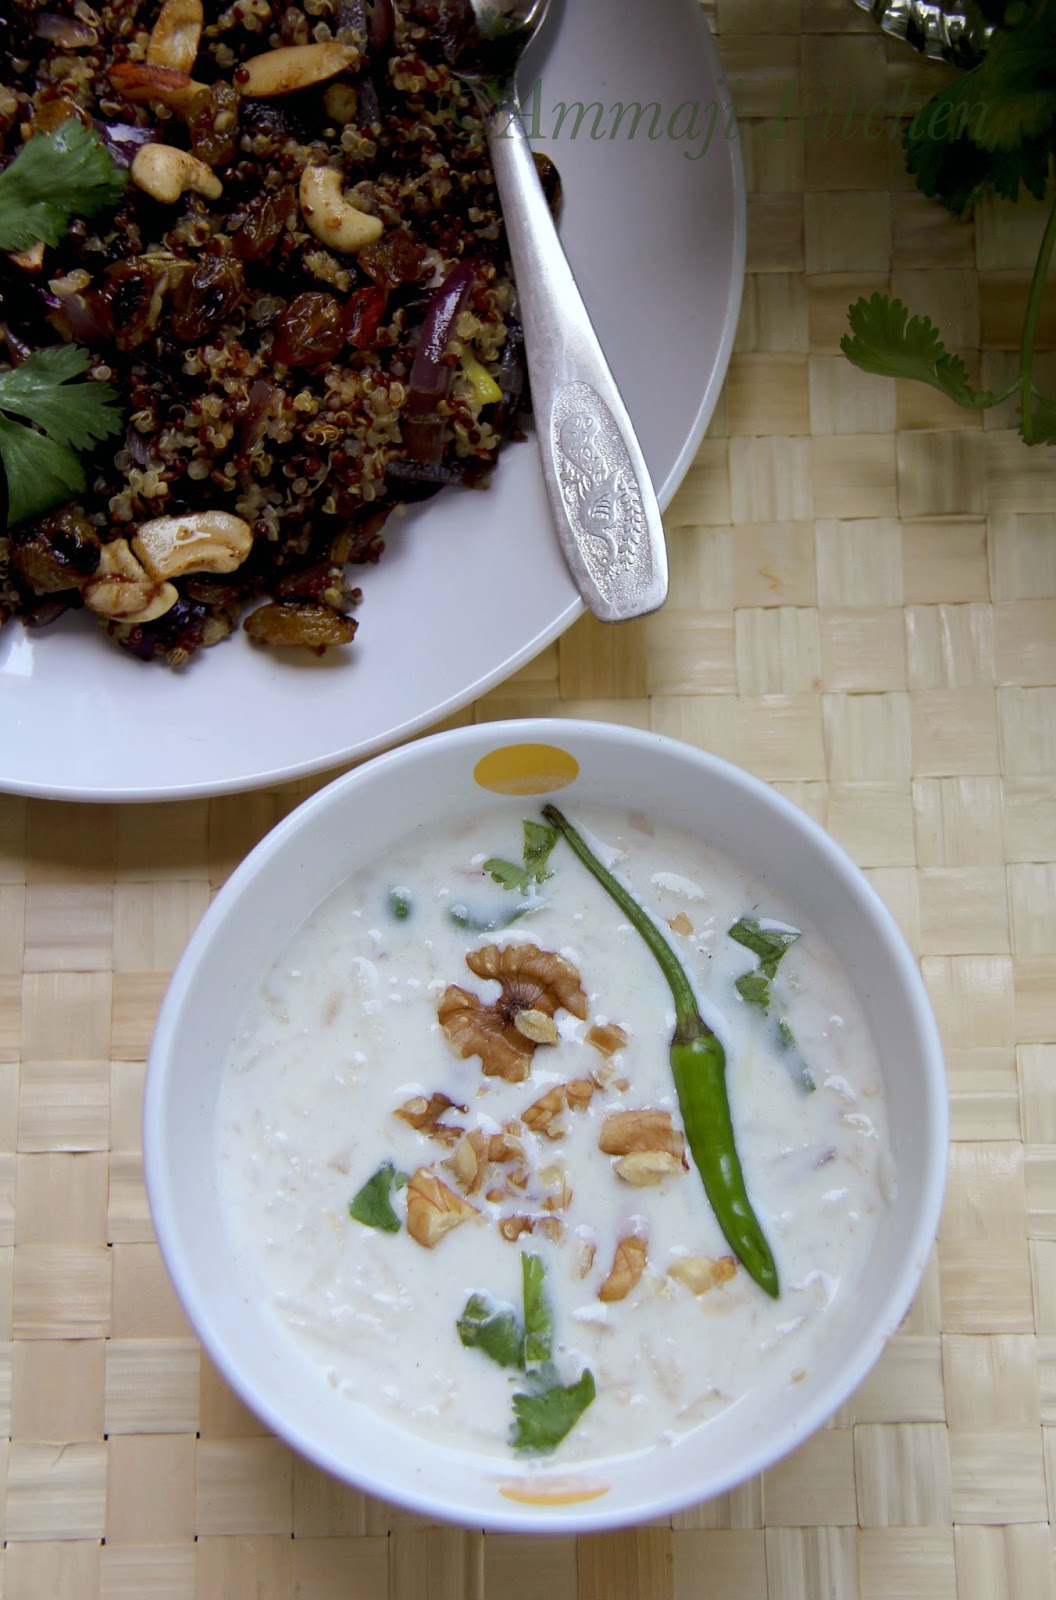
Mooli Raita Recipe | Mullangi Raita | Radish Raita | How to make mooli Raita

Yum
Mooli Raita
Mooli Ka Raita is a Kashmiri style raita that can be served as a side for parathas & rice dishes. The original recipe has a raw grated radish, but that earthy smell of radish is not appealing to any one in house. So to get rid of that smell I fried it with little ghee to make it more tempting & edible.
Mooli Raita
Prep Time-10mins
Cook Time-5mins 
Serves-2people
Ingredients 
1/2Radish grated {Mooli}
1Tbs ghee
2Green chili sliced
2Cups yogurt {Dahi}
1Tsp jeera powder {Cumin powder}
Few walnuts to garnish
2Tbs coriander leaves for garnish
1Tsp sugar
Salt to taste
Directions
- Heat pan with ghee. To that add grated radish & fry it till the raw smells goes off. It take like 1min.
- In a bowl add yogurt, salt, sugar, jeera powder & chili's. 
- To that add cooked radish & mix them well. Adjust salt if needed.
- Garnish with walnuts & coriander leaves. 
- Raita is ready to serve.
Mooli Raita
Follow me on "Facebook", "Google+", "Pinterest" for daily updates. Leave me a comment on any queries regarding this recipe & I will be able to answer it for you as soon as possible.